How To Convert an MX-780 File Into an MX-790 File
The newer MX-790 remote will allow the use of existing MX-780 project files with only slight updating required. This will allow the use of the newer remote for upgrades or replacement situations without the need to create a new MX-790 file from scratch. This is all accomplished within the Complete Control Program (CCP) software using CCP software version 4.11.0712.1 or later.
This article will detail the process for converting an existing MX-780 file, into a new file when using the MX-790 remote.
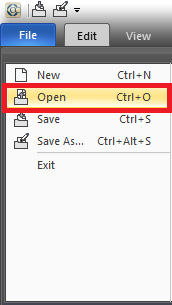
Step 1. Open the Complete Control Program. Under the File tab select Open.
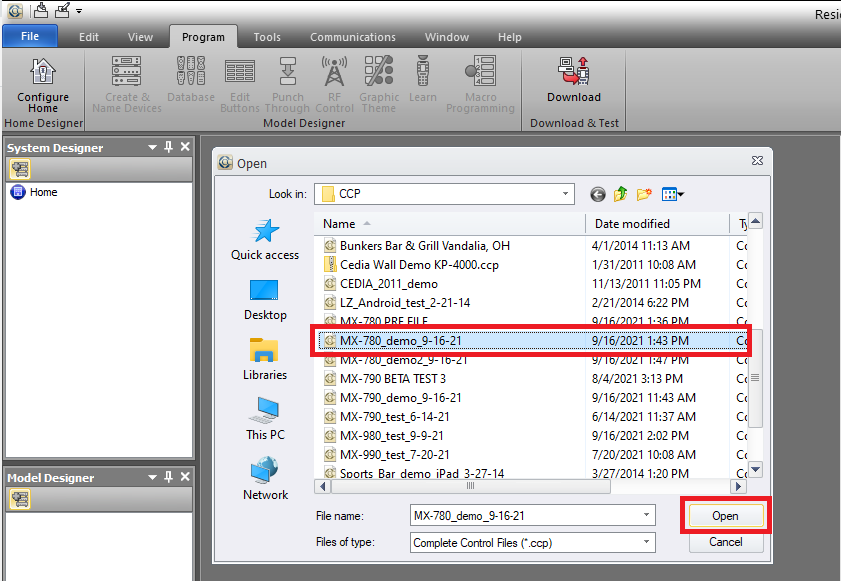
Step 2. Once the Open windows pops up, navigate on the computer to the existing MX-780 file that you want to be converted to the MX-790 and then click Open (see image below).
Step 3. After the existing MX-780 file is open, click on the Configure Home button under the Program tab (see image below).
Step 4. A new window will open labeled System Configuration. Select the MX-790 under "Remotes" and then add it to the configuration by using the <<Add button (as shown below).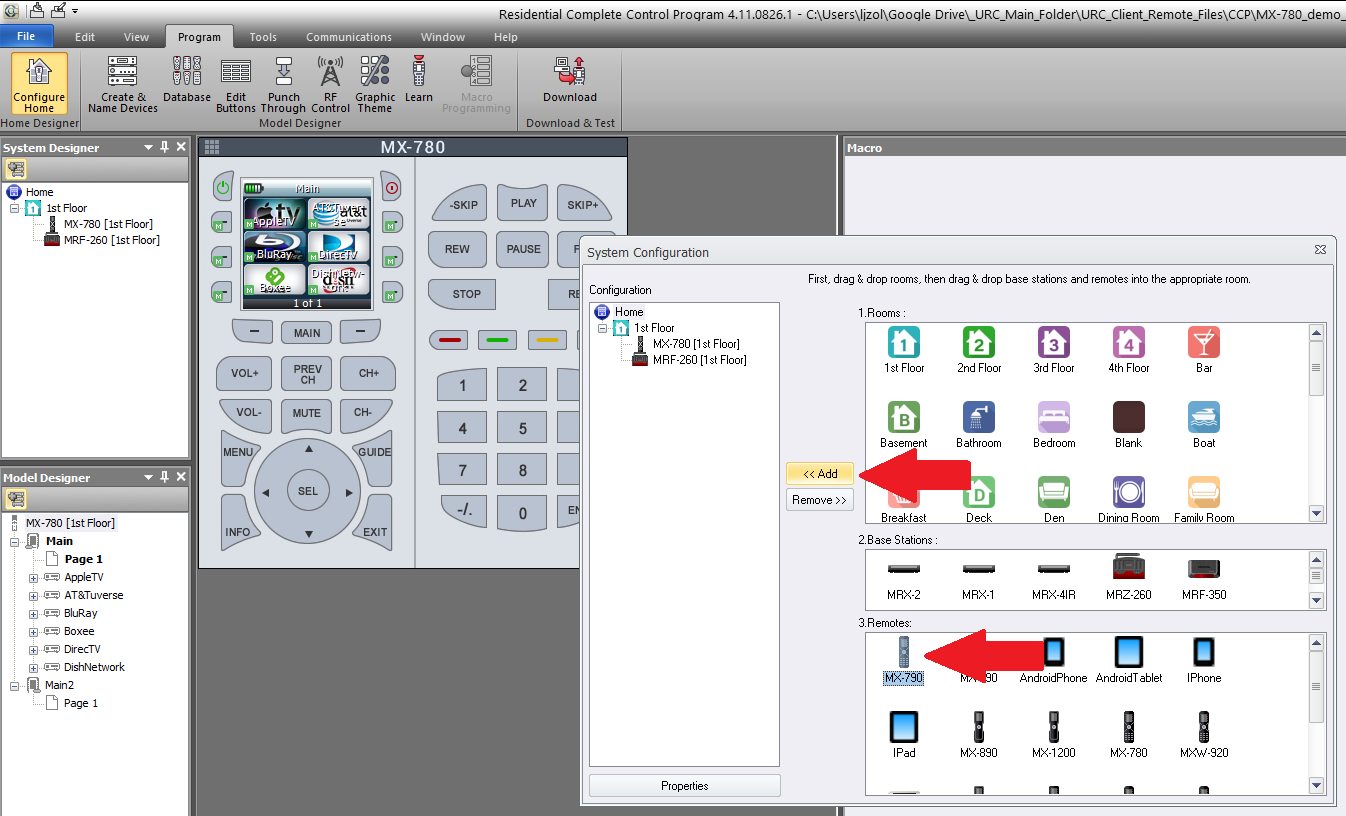
Step 5. Another smaller window will open. In this new Model Property window, select the Default Base Station if your project is using one. This will allow the new remote to inherit the existing base station. If you don't select the default base station here, you will need to manually select it under Program tab>RF Control. In addition, you will also need to adjust the IR/RF routing for the new remote after selecting the base station (Program tab>RF Control). After a conversion, ALL OUTPUTS ARE SET TO IR!
Next, under Option, choose Existing: then select Browse (see image below).

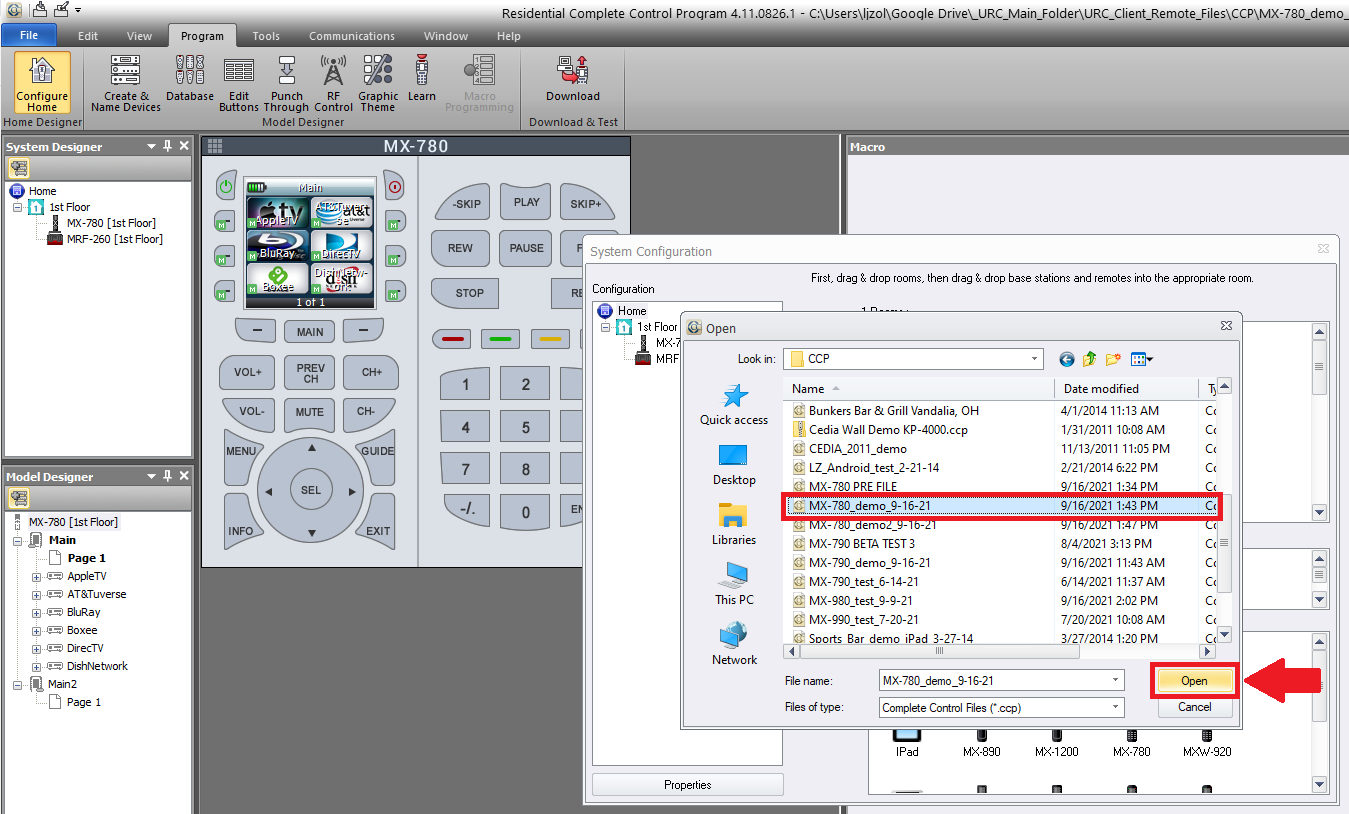
Step 6. Browse/navigate on the computer to the same MX-780 file that you previously opened. Select the desired MX-780 file and then select Open (as shown below).
Pro Tip: If you forget which file you previously opened or where it was located, the complete file path is shown at the top of the Complete Control Program software!
Step 7. Click the OK button to proceed.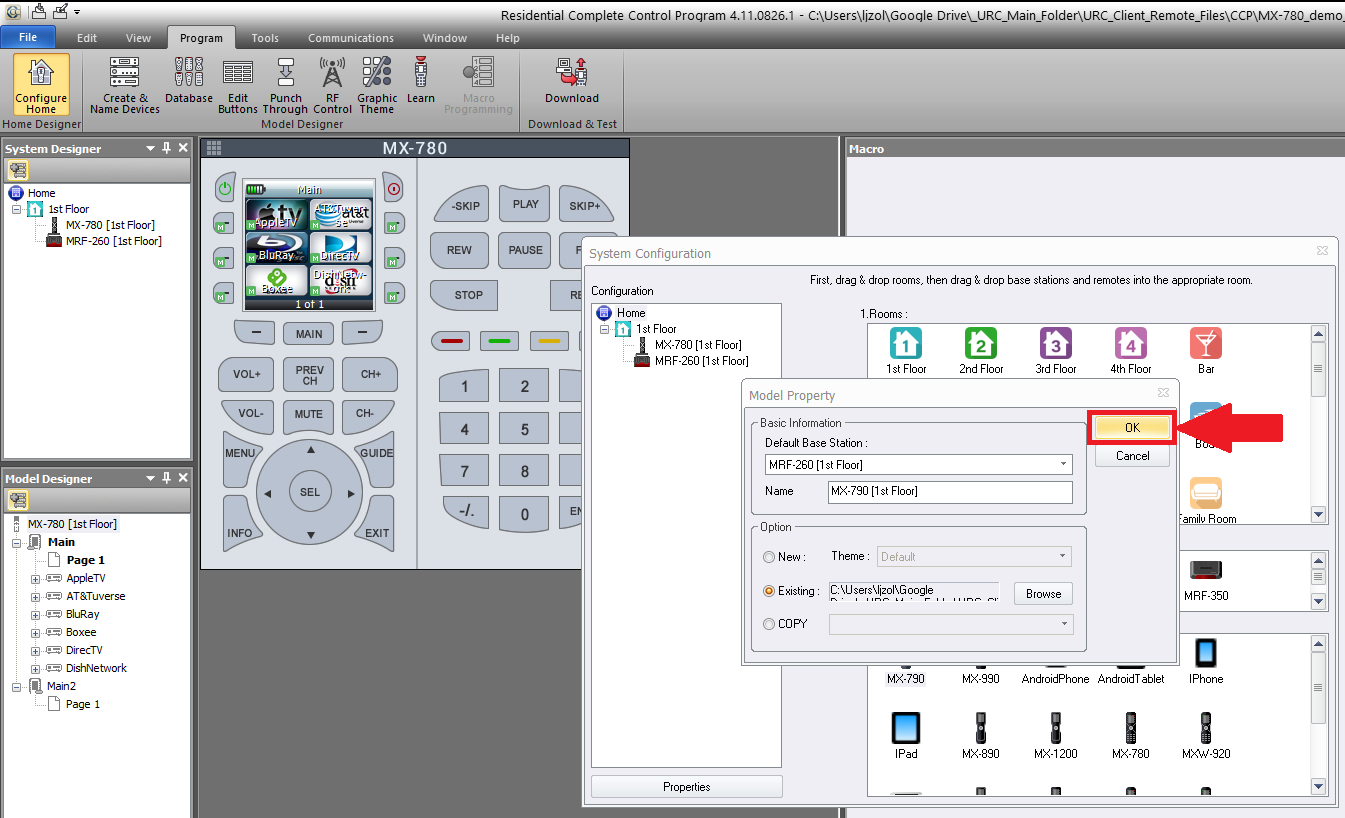
Step 8. This will take you back to the System Configuration window where you can click on the X in the top right corner of the window to close the System Configuration window.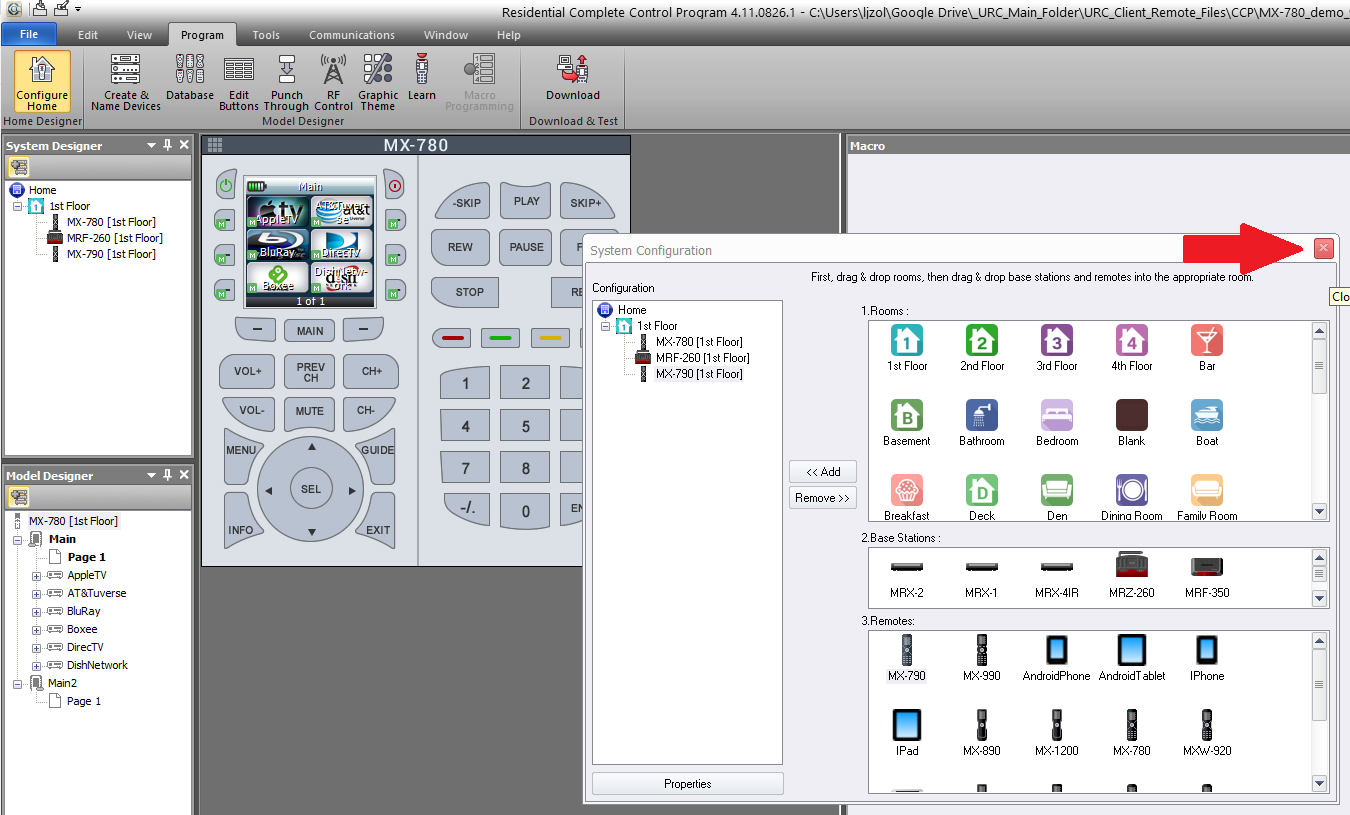
Step 9. You will now end up at the main program window. Before proceeding, it is recommended to save your newly created file. The Complete Control Program (CCP) software does not perform an automated save. Use File>Save (or Save As...) to save your file to your computer.
Pro Tip: Use Ctrl+S to save the file often while programming your file!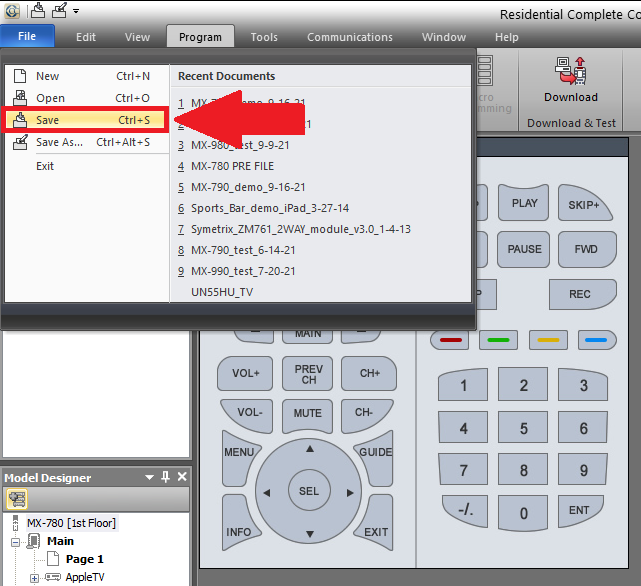
Step 10. The old MX-780 will still be displayed after exiting. You will need to select the new MX-790 by selecting it and then double-clicking on it to open the new remote.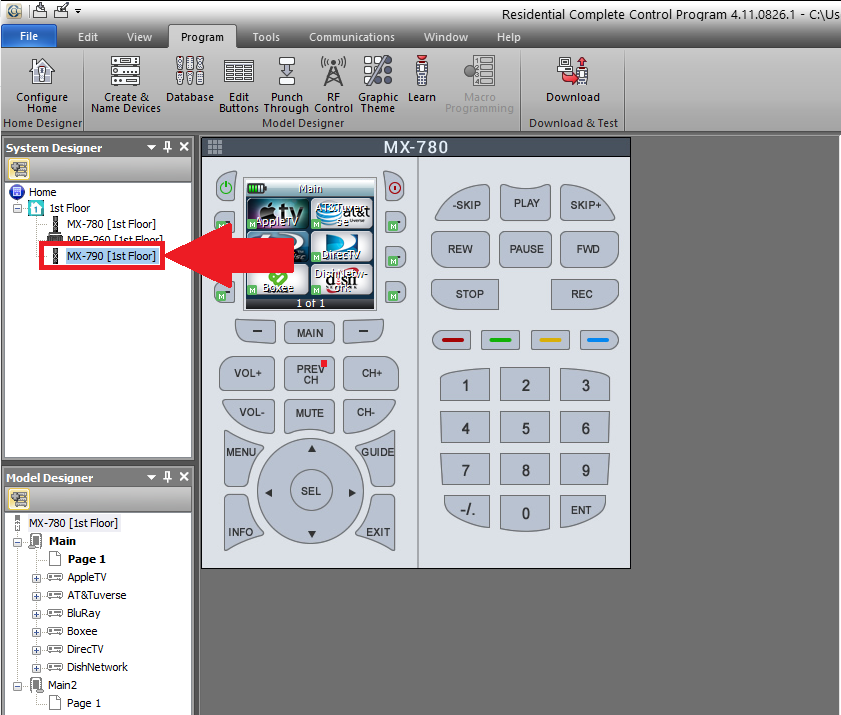
The MX-790 can accept a conversion file from an MX-780 but due to the larger LCD screen and the image size differences, no existing images will transfer to the MX-790. You will see buttons but no images. There are a few steps to take in order to add new images.
Step 11. To add new images, first select Create & Name Devices from under the Program tab.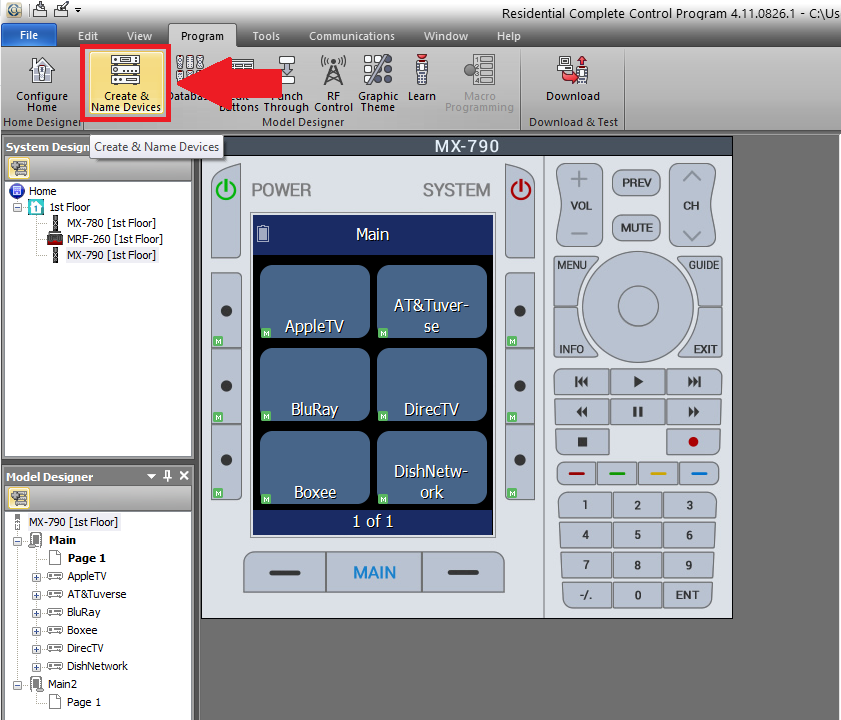
Step 12. This will open the Program>Devices window. This is where you will add the images to your existing buttons.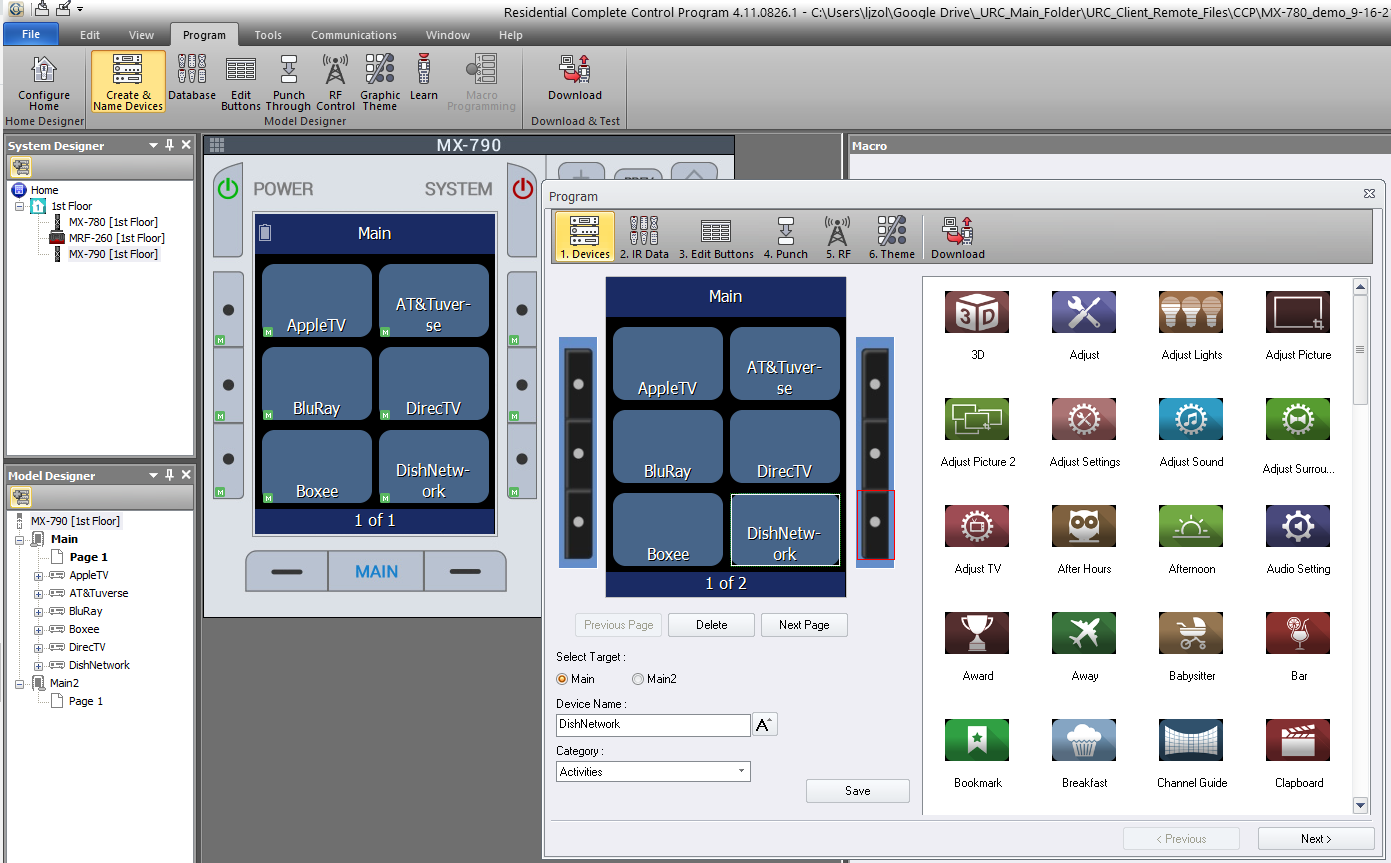
Step 13. To browse for your desired image(s), first select the desired Category for the image(s). For this example, we are choosing Brands to add/replace the AppleTV image on the top left button on the remote.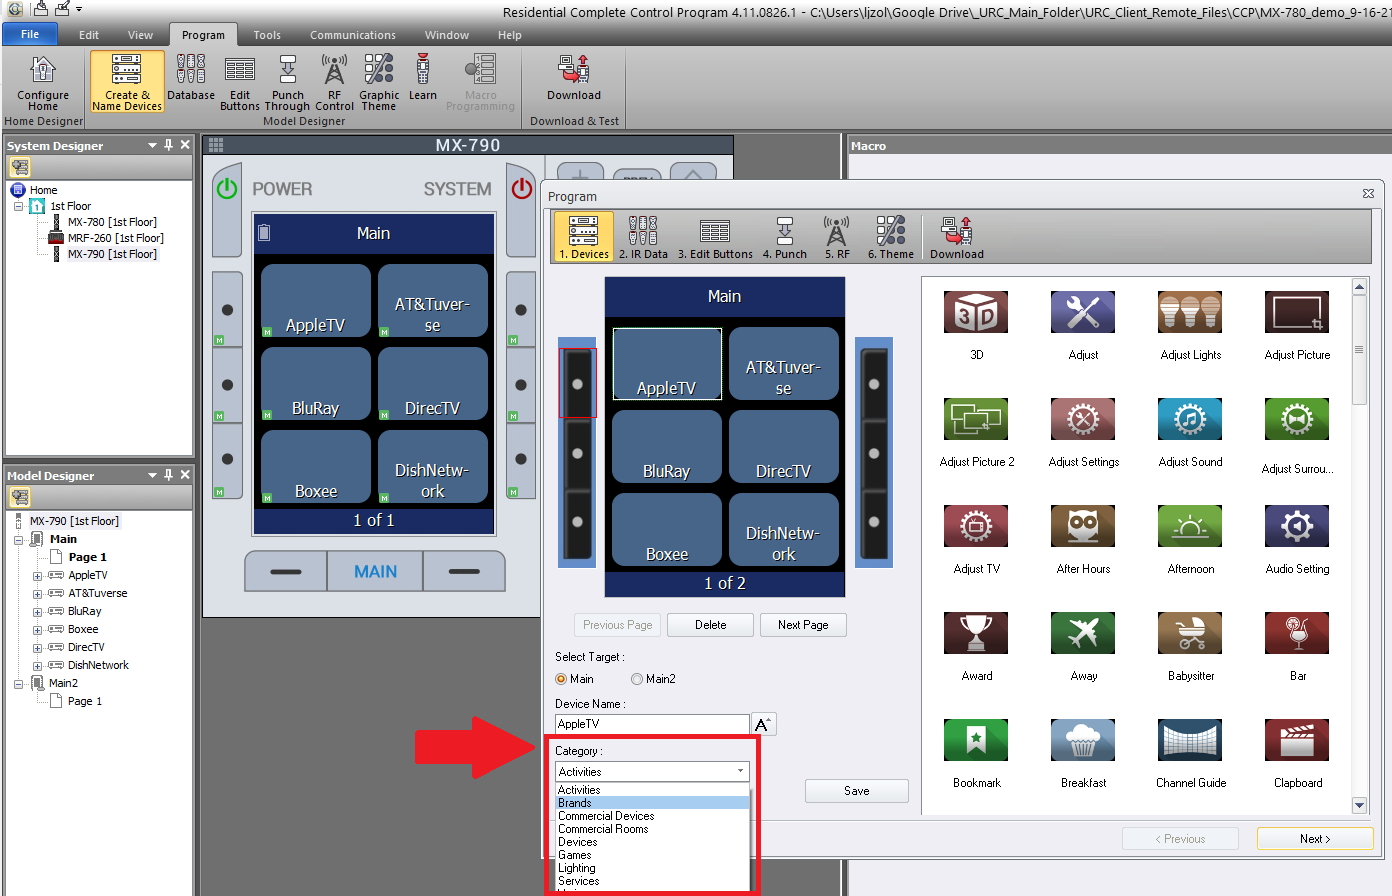
Sep 14. Select the desired image, click-and-hold your left mouse button to drag it onto the desired button. If you make a mistake or want to choose a different image, simply repeat this procedure.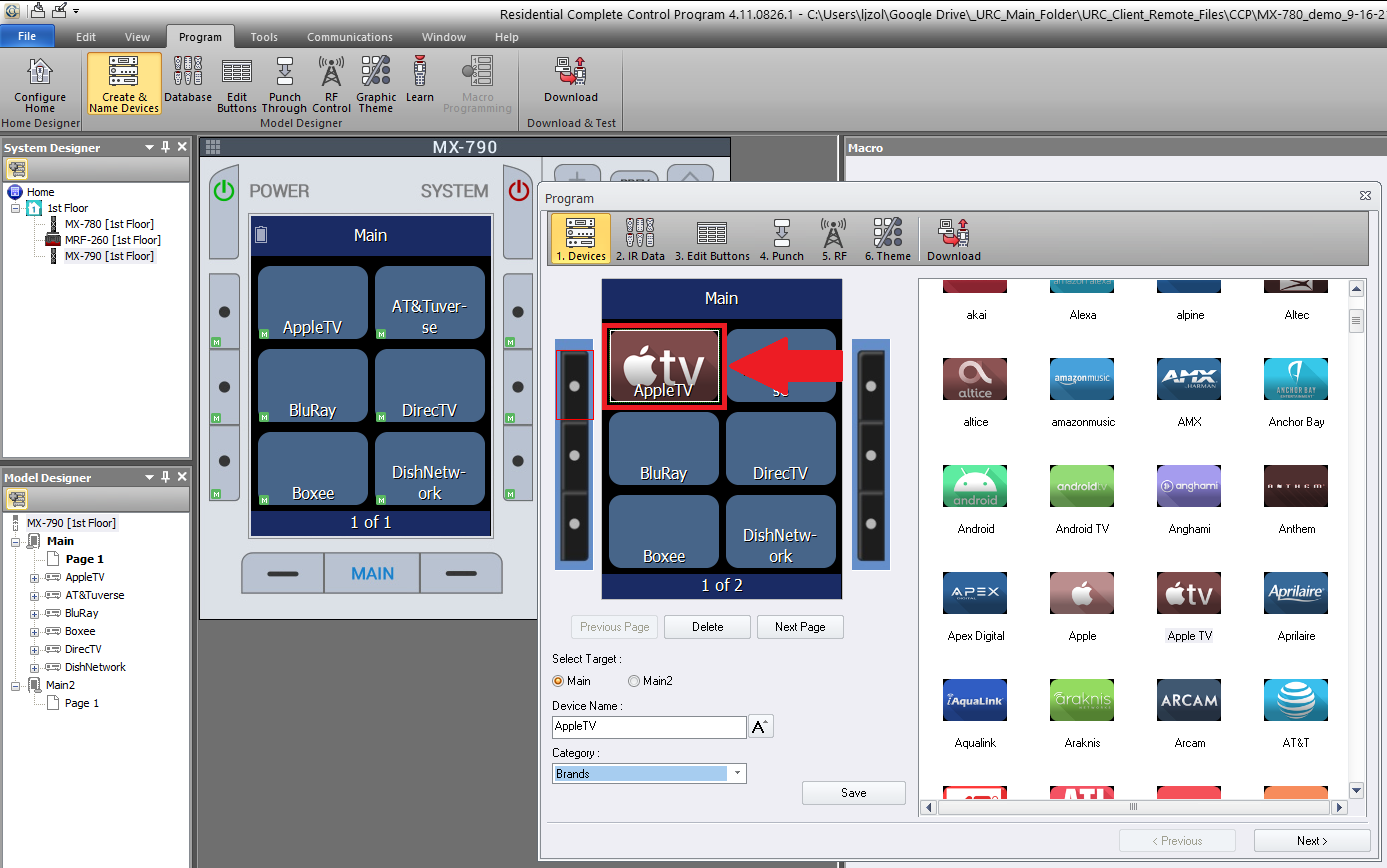
Step 15. The "Replace" dialog box will pop up asking how you would like to proceed. To replace only the image, we click on Image Only. This will add the image to the button but not affect the associated device (as shown below).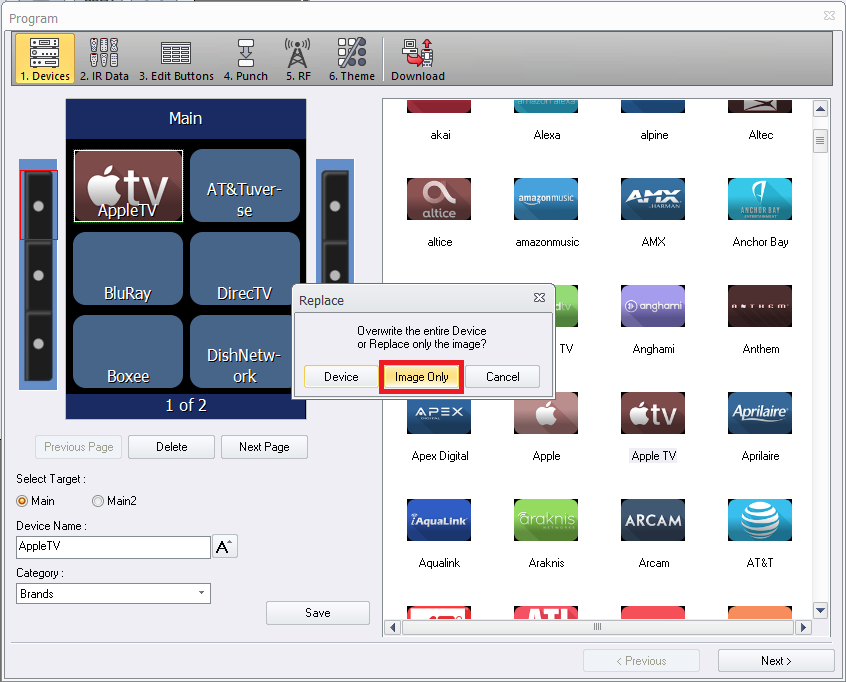
Step 16. Continue this process to add/replace images for all devices on all pages. Click Save when done.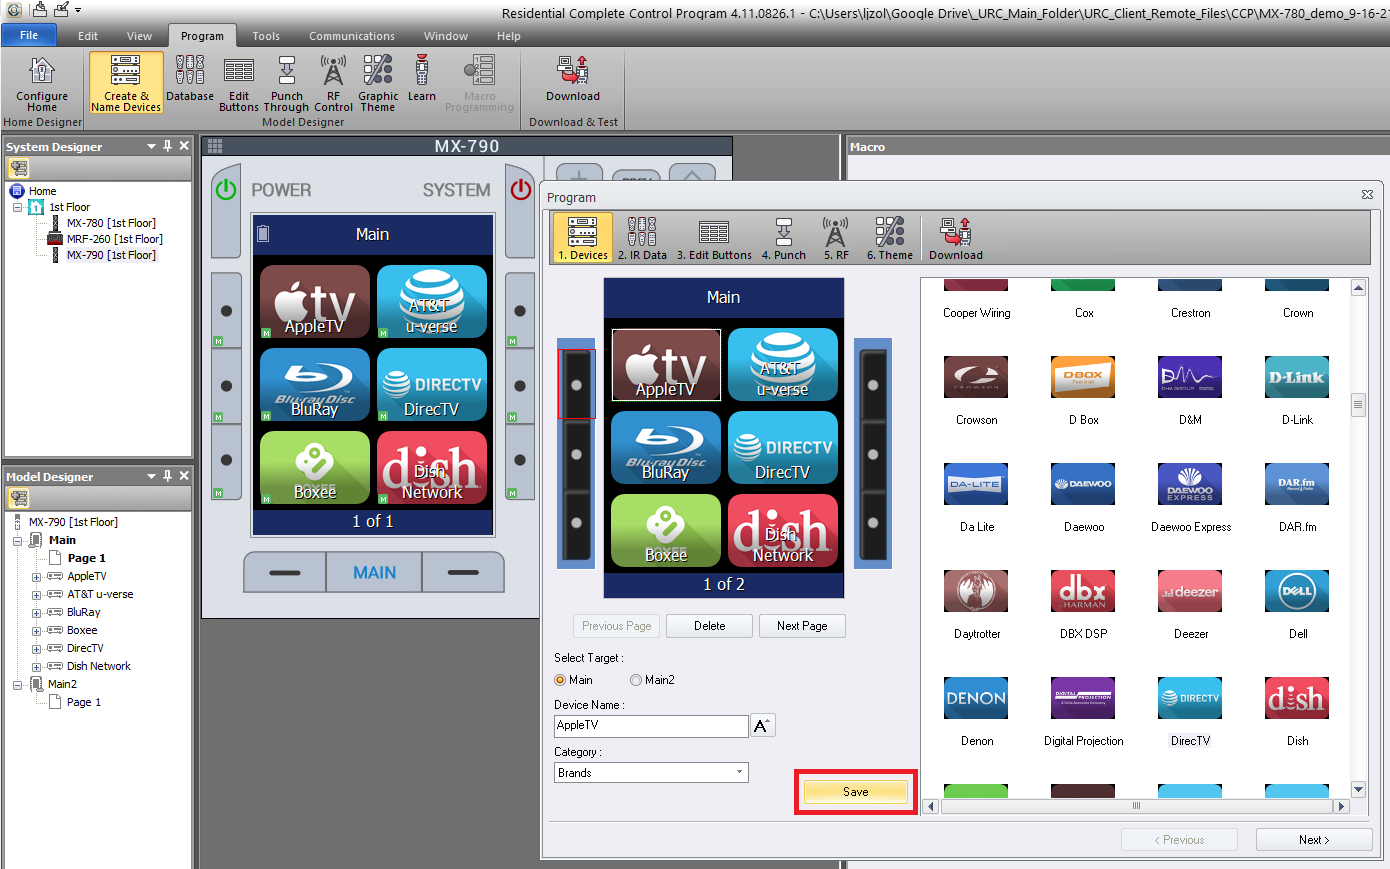
Step 17. Perform any additional updates or changes as required. When finished, again Save your file.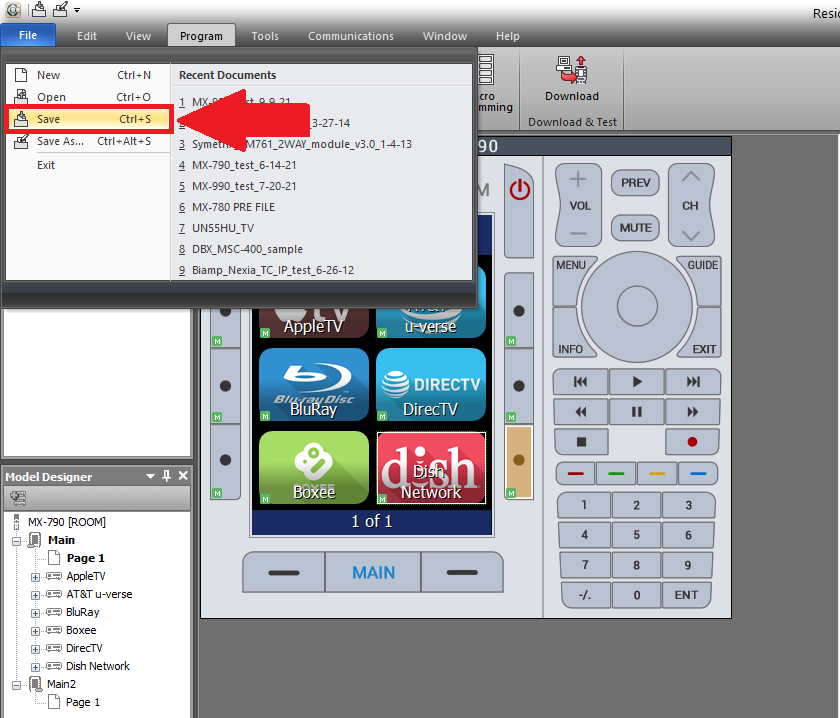
Note: As a good standard practice, please perform the following items before departing the customer location:
- Check the IR & RF routing on the new remote under Program (tab)>RF Control. Verify all is correct compared to the original MX-780.
You will also need to adjust the IR/RF routing for the new remote after selecting the base station (Program tab>RF Control).
After a conversion, ALL OUTPUTS ARE SET TO IR! - Test the macro functionality of the new remote.
- Make sure no new devices have been added or changed by the customer. In particular, cable and satellite boxes tend to change over the years during which a system was first installed. This may require updating IR codes, programming, etc.
Additional Information & Resources:
Please also refer to the article for the MX-780, MX-790, MX-890 and MX-990 Can't Connect or Download - MX-780, MX-790, MX-890 and MX-990.
Please also refer to the article How To Convert An MX-980 File Into An MX-990 File
