How to Erase and Default an MRX Controller
URC Accelerator 3 software provides a new option for erasing and defaulting an MRX controller. This may be required on occasions when the system data is corrupted or otherwise unusable.
This article details the steps when using the Erase and Default option inside Accelerator 3 software.
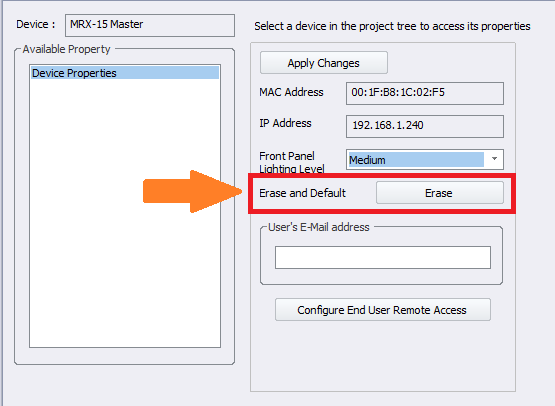
What is Erase and Default?
Selecting the Erase and Default option deletes the DATA folder within the MRX unit. This is required on rare occasions when the data is corrupted or otherwise unusable.
There are generally two scenarios when an Erase and Default will be performed:
1. When URC Tech Support advises an Erase and Reset due to possible system file data corruption.
2. When the MRX controller has been previously used on a project and you wish to use the same MRX controller for an entirely different project and you want to factory default the unit.
Only use the Erase and Default button when instructed by URC Tech Support or when you are reusing an MRX in a different project and would like to erase all device data!
This will factory default the unit, delete the DATA folder within the MRX unit and will not allow for a file extraction after the process completes!
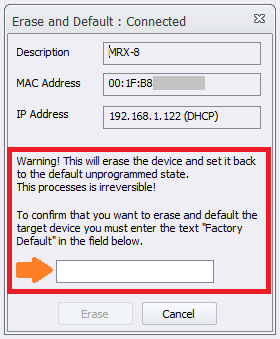
Please make sure that you have a backup project file saved prior to the Erase and Default operation!
Be aware that certain elements of a project are NOT stored within the system project file. If the unit is being used again in the same project, erasing the MRX unit requires the setup and reconfiguration of favorite channels, pairing of unified modules, and unified room settings that may have been made previously. Any devices using MRX/controller system tokens such as smart TV's, thermostats, voice control services (Alexa, Google), etc. will require re-authentication.
Selecting the Erase and Default option: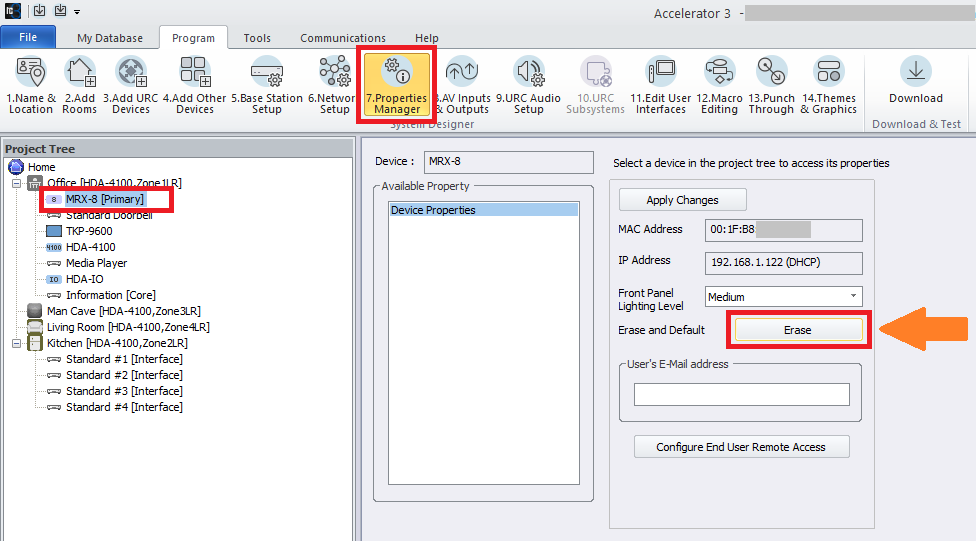
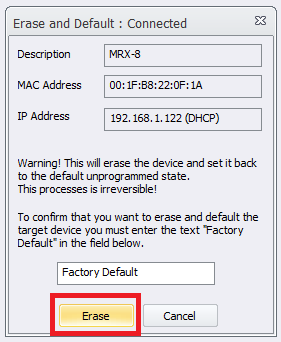
3. If the text is entered correctly, the Erase button will now be visible. Click the Erase button to proceed:
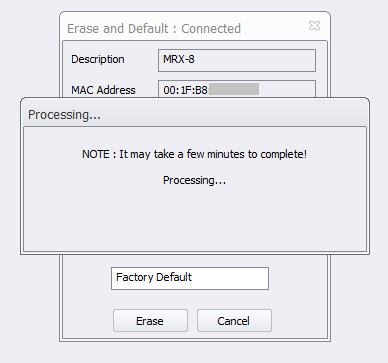
4. A Processing... window will appear. Please wait while the process completes:
5. When the process completes, a new window will open showing a successful completion and asking you to restart the device:
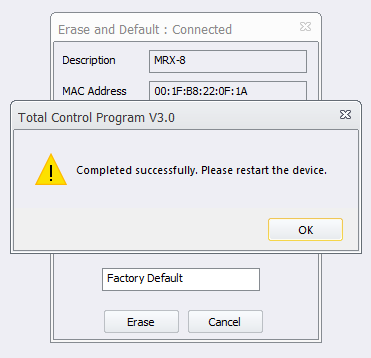
6. Restart the device by unplugging and re-plugging the power cable or using the reset button on the unit.
Additional Information & Resources:
To learn more about Accelerator 3 configuration and programming, please see the Accelerator 3 online Programming Guide.
