Total Control Accelerator 3 software offers a large variety of built-in background images that enable installers to add a higher degree of personalization & customization to projects and the various URC Graphical User Interfaces (GUI's). In some cases, you may also want to add a custom background image to a project's Graphical User Interfaces.
This article details adding and using Custom Background Images in Accelerator 3, but the process is very similar in Accelerator 2.0, using a slightly different file path where applicable.
Custom Background Images
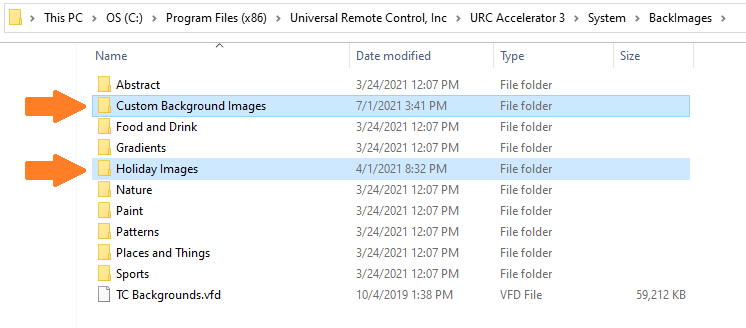
Any desired Custom Background Images should be placed into the following folder on the PC:
C:\Program Files (x86)\Universal Remote Control, Inc\URC Accelerator 3\System\BackImages
This folder also contains the default system images .vfd file labeled as "TC Backgrounds.vfd". This is a compressed system file and it should not be changed or removed!
The image below shows two (2) new folders added to the existing default folders that Accelerator 3 automatically adds (Abstract, Food & Drink, Gradients, Nature, Paint, Patterns, Places and Things, and Sports). The folders labeled as Custom Background Images & Holiday Images have been added to the main "BackImages" folder. These folders can be labeled however you want, to allow you to locate your custom images more easily (see image below):
Note: Adding these new folders may require administrator privileges!
Note: If you add custom images to the same folder as the folder with the .VFD file, the custom images do not appear inline, alphabetically, but will appear at the end, after the VFD images when browsing the images.
Adding a Custom Background Image in Accelerator 3:
1. After adding the Custom Background Images as detailed above, go to Step 2: Add Rooms and right-click on the desired room where you would like to change the background image from within the Project Tree.
2. Select "Properties" from the fly-out.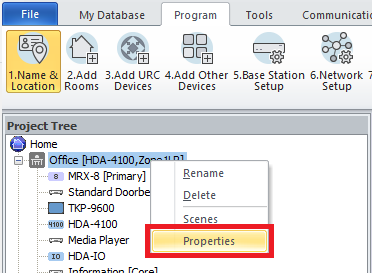
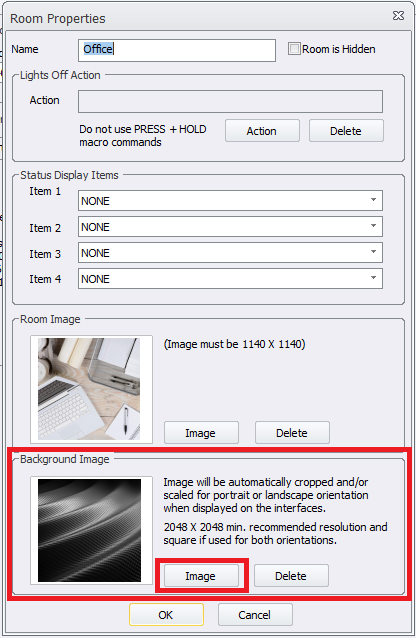
3. This opens the main Room Properties window. Under the Background Image section, select the "Image" button to open and select the desired images folder:
Note: This new window may take a few moments to open depending on the speed of your computer and other PC related factors!
4. Click the "Browse" button with the three (3) dots: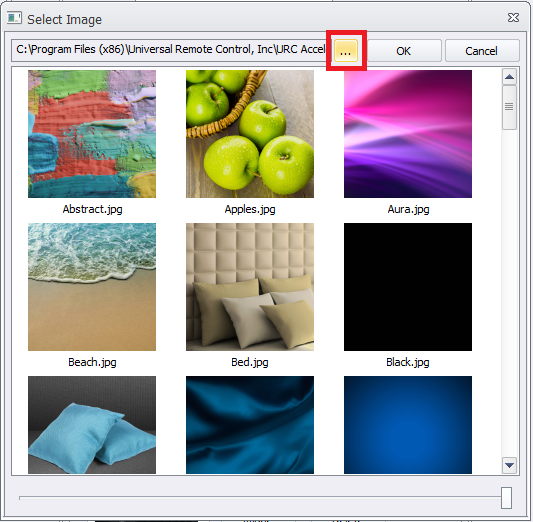
5. This opens another window that allows you to select any image folder(s) that were created earlier. You can also select any of the standard image folders if you would like to browse those images:
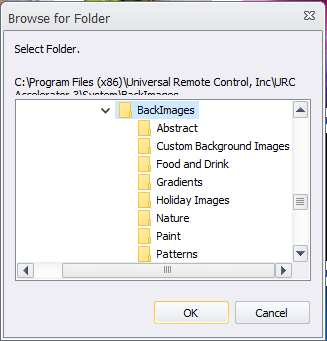
6. Once the desired folder is selected, select the OK button to open and browse the images in that folder.
In this example, I have selected the "Holiday Images" folder: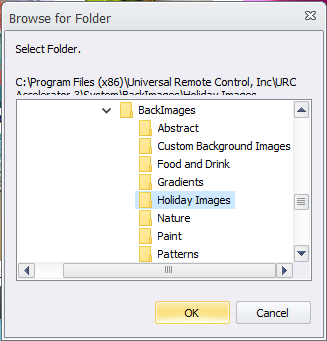
7. You can then select the desired custom image and then press OK: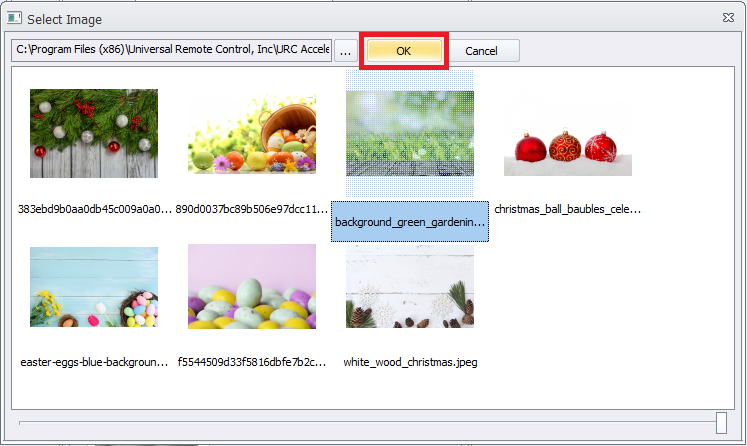
8. After pressing OK, you will again return to the main Room Properties window where you will see your image selected as the new Background Image. Press OK again to apply your new image selection: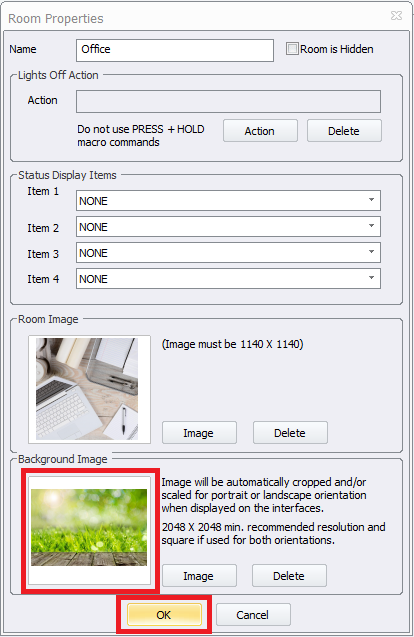
Required Properties for Background Images:
- Image Location
Images can be located anywhere on your PC but it is recommended to place them in an easily-identifiable folder as shown above. This makes your custom images easy to locate when browsing inside of Accelerator 3. - File Type
JPG (.jpg or .jpeg) is recommended but not absolutely required. The system is going to convert other formats to JPG but that means relying on the systems conversion process.
To determine an image file type, do the following in Windows:
1. Locate your desired image.
2. Right-click on the image, select "Properties":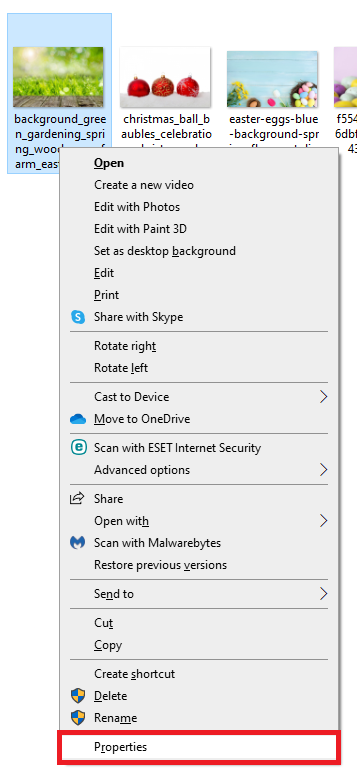
3. Select the "General" tab. The image type will be displayed (as shown below):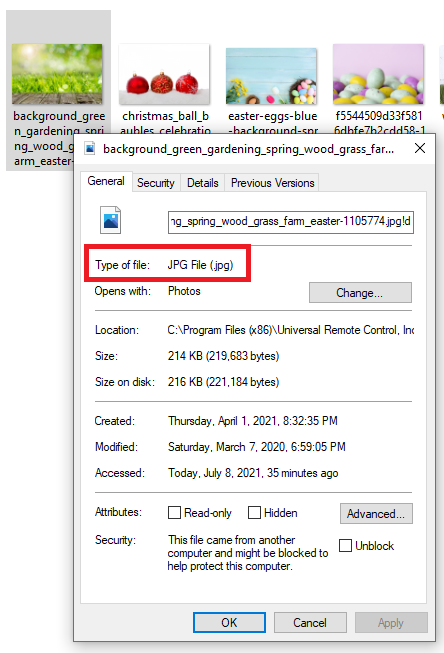
- Image Format
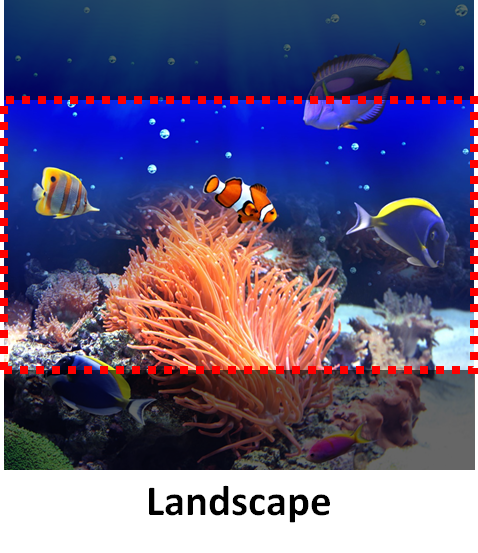
The dimensions do not require being square, but it is recommended. This is suggested so that a device such as a mobile device that may be in landscape or portrait orientation will look decent both ways.
The image(s) are automatically cropped and/or scaled for portrait or landscape orientation when displayed on the interfaces.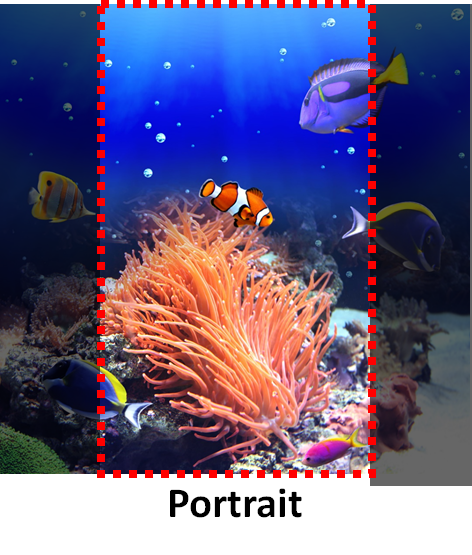
- Image Size
The image should be as high-quality as possible especially if using high-resolution touchpanels and mobile phones or tablets.
2048 x 2048 pixels is the minimum recommended resolution and square if used for both orientations (portrait & landscape) render properly on all system UI's. - Color Bit Depth
16-bit and 24-bit depth images work properly in Accelerator 3. Any image above a 24-bit bit depth should be converted to 16-bit or 24-bit.
Determining an Image Dimensions & Bit Depth
To determine an image dimensions and/or bit depth, do the following in Windows:
1. Locate your desired image.
2. Right-click on the image and select "Properties" (as shown below):
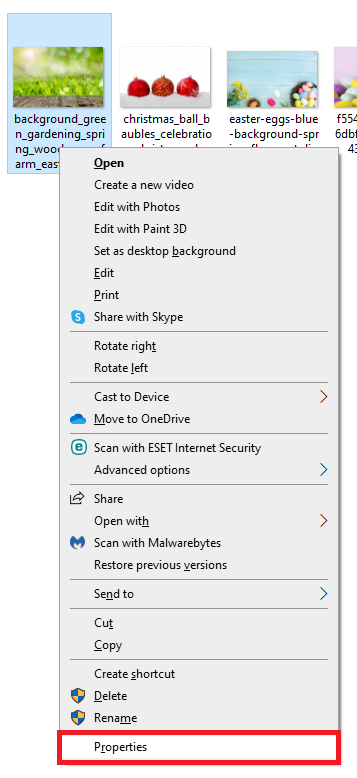
3. Select the "Details" tab to view the image details (as shown below):
This process allows you to determine if the image is suitable for use as a background image.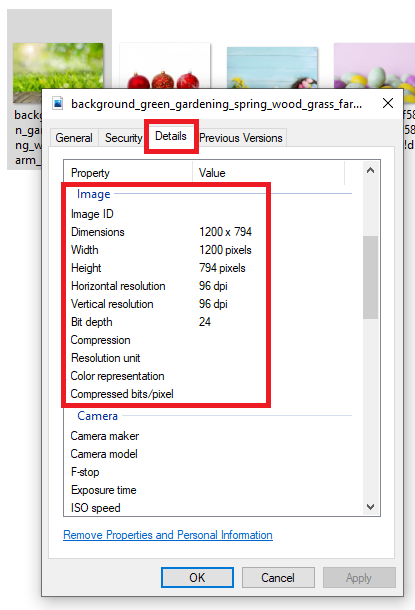
Acquiring Hi-Quality Background Images
Hi-quality images can be acquired from many sources, including your own camera or even your mobile phone camera.
If using a photo from your camera or phone, simply transfer that image to your PC or laptop and place it into a folder using the instructions detailed at the beginning of this article.
One source that many programmers use is Google Images at https://images.google.com/. This allows for a searchable database of public-domain images for use as backgrounds.

In addition, Google Images offers a few tools to make searching for your desired images easy.
1. After searching for you desired type of image(s), you can use the "Tools" option to narrow your search (as shown below):

2. After selecting the Tools option, you can choose a variety of image options including the size (Any size, Large, Medium, Icon) as well as the Color, Type and Usage Rights (see image below):
Note: Under "Usage Rights" you will see options for searching for "Creative Commons Licenses" & "Commercial & Other Licenses". Please observe proper usage rights.
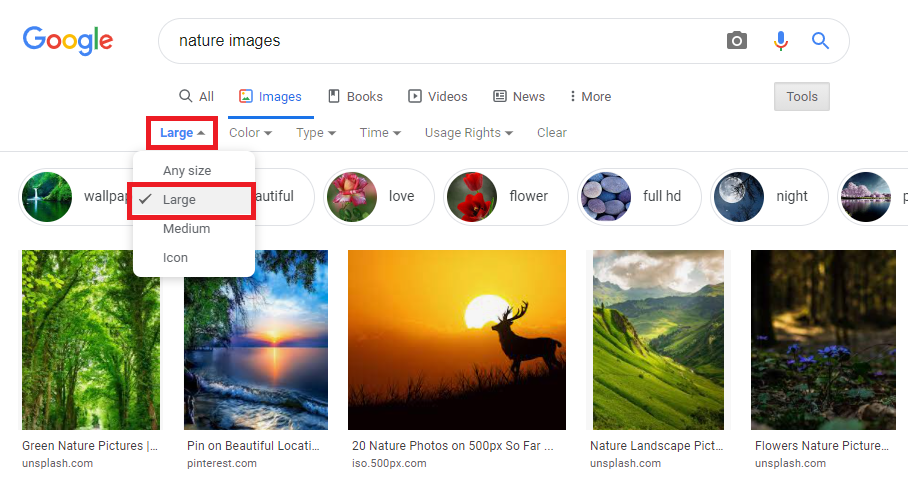
3. Make sure to download the original image and not the preview image. This will assure that you get the highest-quality image possible.
You may have to visit another website to do this.
Additional Information & Resources:
Please refer to the article Adding Custom Room Images for additional information on adding room images in Accelerator 3.
Download the Total Control Graphics Expansion Pack from the URC Dealer Portal (You must first be logged-in to download the file).
Download the Total Control Flat Vector Icon Sets from the URC Dealer Portal (You must first be logged-in to download the file).
To learn more about Accelerator 3 configuration and programming, please see the Accelerator 3 online Programming Guide.


