Total Control Accelerator 3 software offers a large variety of built-in Room Images that enable installers to add a higher degree of personalization & customization to projects and the various URC Graphical User Interfaces (GUI's). In some cases, you may also want to add a Custom Room Image to a project's Graphical User Interfaces.
This article details adding and using Custom Room Images in Accelerator 3 but the process is very similar in Accelerator 2.0 using a slightly different file path, where applicable.
Custom Room Images
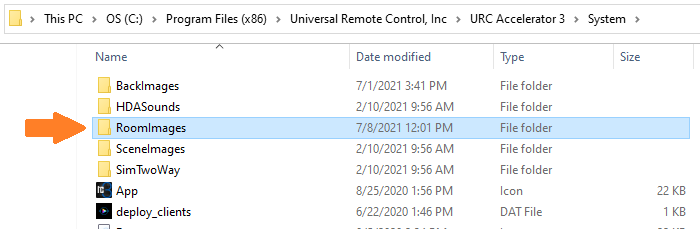
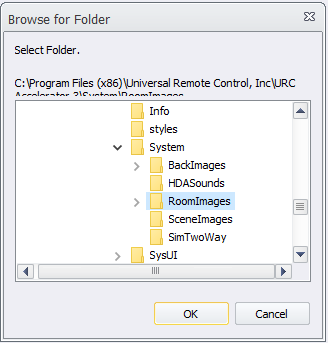
Any desired custom room image should be placed into the following folder on the PC:
C:\Program Files (x86)\Universal Remote Control, Inc\URC Accelerator 3\System\RoomImages
Room Images folder location (see image below):
Double-clicking on the RoomImages folder will open it and you will see the default system images .vfd file. This is a compressed system file and it should not be changed or removed! (see image below):

The image below shows one (1) new folder added to the existing default "RoomImages" folder. This folder has been labeled as "Custom Room Images" but any new folders can be labeled however you want to allow you to easily locate your custom images (see image below):
Note: Adding this new folder may require administrator privileges!
Note: If you add custom images to the same folder as the folder with the .VFD file, the custom images will not appear inline, alphabetically, but will appear at the end, after the VFD images when browsing the images.

In addition, you can also add sub-folders within this new "Custom Room Images" folder to allow for easily keeping track of custom room images for specific projects. In the image shown below, the client-named folders have been added and custom images can be added to those individual folders.

Adding a Custom Room Image in Accelerator 3:
1. After adding the Custom Room Images as detailed above, you must then right-click on the desired room where you would like to change the room image in the Accelerator 3 Project Tree.
2. Select the "Properties" option as shown below: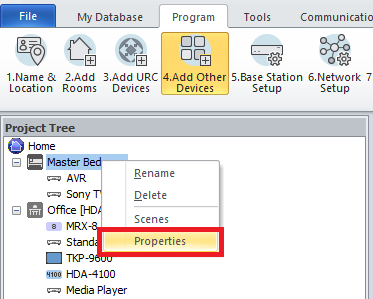
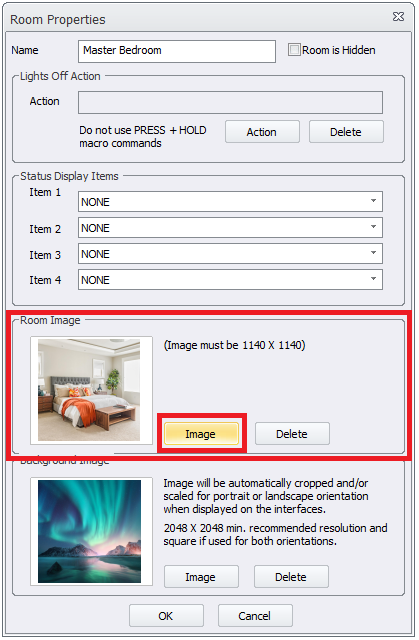
3. This will open the main Room Properties window. Under the Room Image section, select the "Image" button to open and select the desired images folder:
Note: This new window may take a few moments to open depending on the speed of your computer and other PC related factors!
4. Click the button with the three (3) dots: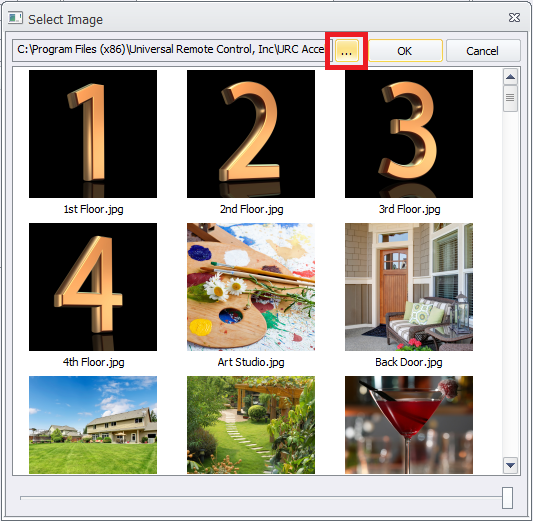
5. This will then open another window that will allow you to select any room image folder(s) that were created earlier. You can also select any of the standard room images by simply selecting "Room Images" if you would like to browse those images:
Note: The > arrow to the left of the RoomImages folder shows that this folder also contains additional sub-folders. Clicking on the > arrow will allow you to view these sub-folders (see step #6 below):
6. Once you select the desired folder, select the OK button to open and browse the images in that folder.
In this example, we have selected the "Jones Residence" folder: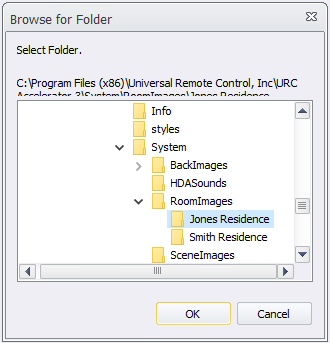
7. You can then select the desired custom image and then press OK: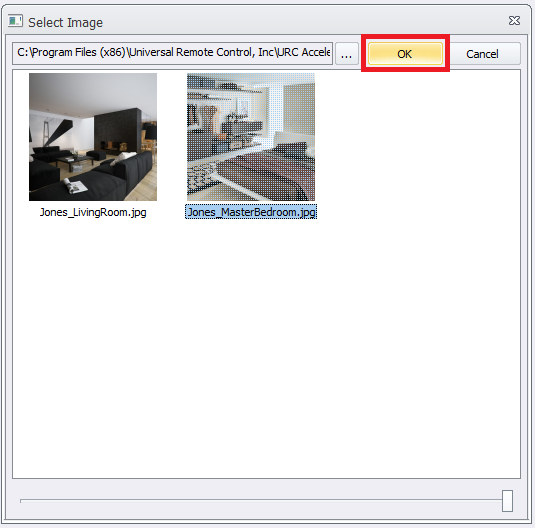
8. After pressing OK, you will again return to the main Room Properties window where you will see your image selected as the new Background Image. Press OK again to apply your new image selection: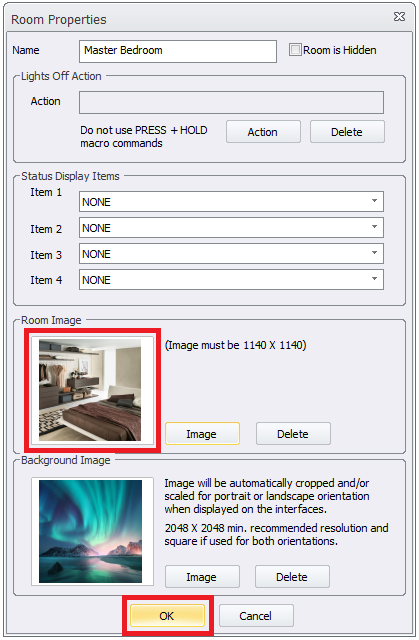
Required Properties for Room Images:
- Image Location
Images can be located anywhere on your PC, but it is recommended to place them in an easily-identifiable folder as shown above. This makes your custom images easy to locate when browsing inside of Accelerator 3. - Image Size
The image must be 1140 x 1140 pixels to be able to be used as a Room Image. - File Type
JPG (.jpg or .jpeg) is recommended.
To determine an image file type, do the following in Windows:
1. Locate your desired image.
2. Right-click on the image, select "Properties":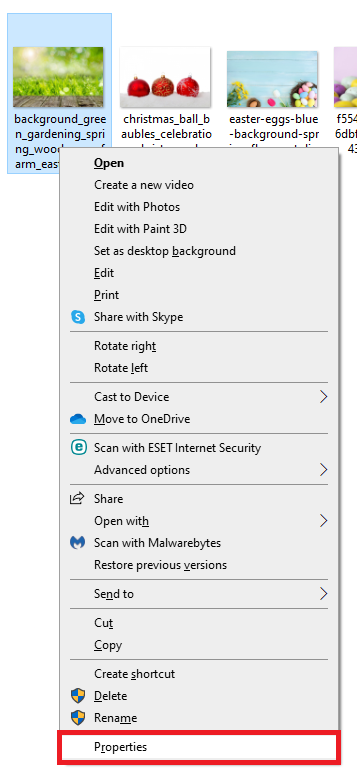
3. Select the "General" tab. The image type will be displayed (as shown below):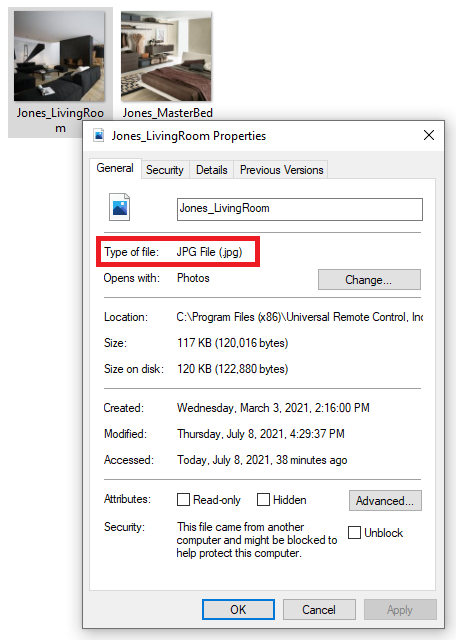


Determining an Image Dimensions
To determine an image dimensions, do the following in Windows:
1. Locate your desired image on your PC.
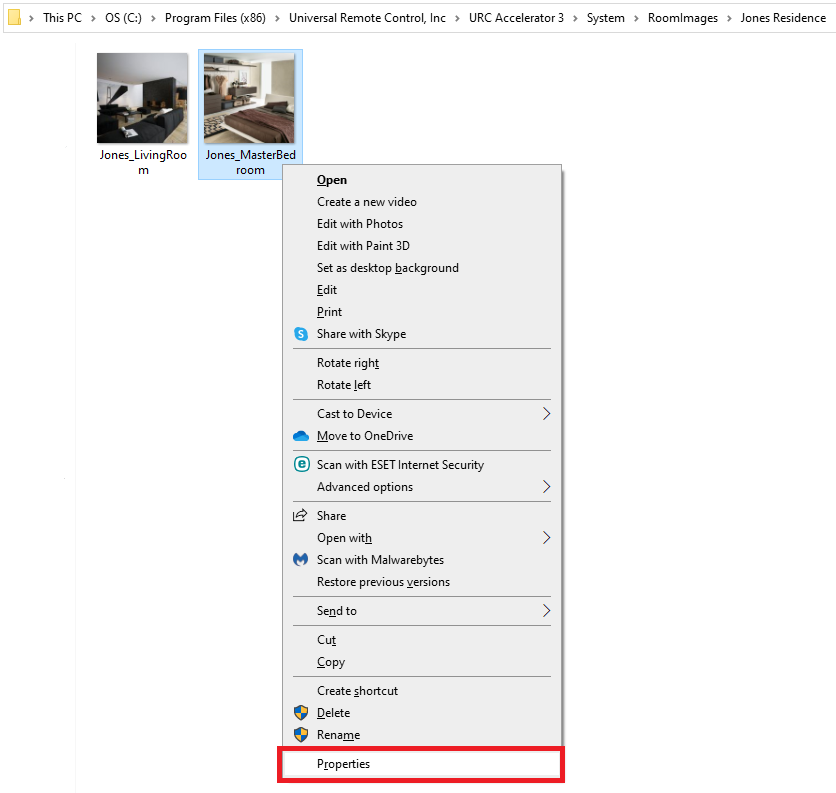
2. Right-click on the image and select "Properties" (as shown below):
3. Select the "Details" tab to view the image details (as shown below):
This process will allow you to determine if the image is suitable for use as a Room Image.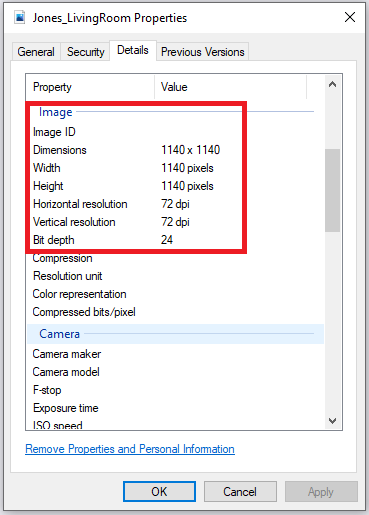
Acquiring Hi-Quality Room Images Using an iPhone
iPhone:
The following Apple website will explain the various camera modes on an iPhone, specifically using Square Mode:
Use camera modes on your iPhone, iPad, and iPod touch
Square mode limits the frame of your camera screen to a square on an iPhone 12, iPhone 12 mini, iPhone 12 Pro, iPhone 12 Pro Max, iPhone SE (2nd generation), iPhone 11, or iPhone 11 Pro.
You can then resize your photo using a simple editor such as Photopea to achieve the desired 1140 x 1140 pixel size for use as a Room Image.
Photopea is a trademark of Ivan Kutskir. Photoshop is a trademark of Adobe Inc.
Additional Information & Resources:
Please refer to the article Adding Custom Background Images for additional information on adding background images in Accelerator 3.
Download the Total Control Graphics Expansion Pack from the URC Dealer Portal (You must first be logged-in to download the file).
Download the Total Control Flat Vector Icon Sets from the URC Dealer Portal (You must first be logged-in to download the file).
To learn more about Accelerator 3 configuration and programming, please see the Accelerator 3 online Programming Guide.
