URC HDA devices and software provide countless options to configure and optimize audio settings to achieve performance and flexibility for almost any application.
One of those features is the HDA-4100 Preamplifier Outputs
This article provides a better understanding when using the Preamplifier Outputs on the HDA-4100 and details the procedure for configuring the Preamplifier Output settings when using Accelerator 3 or TC Flex 2 software.
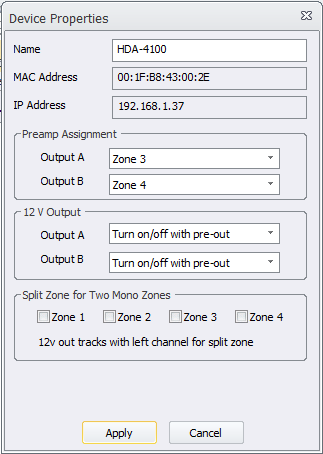
HDA Preamplifier Outputs “A” and “B” need to be assigned to one of the HDA-4100’s zones. Preamplifier Outputs “A” and “B” cannot be used as an independent zone output. The Preamplifier Outputs require assignment to an HDA-4100 zone and shall "mock" that zone in audio play.
This is done in Step 3: Add URC Devices in both Accelerator 3 and TC Flex 2 software by right-clicking on the HDA-8100 amplifier in the Project Tree and selecting “Properties”:
Once the Preamplifier Outputs have been assigned to a zone, the audio properties of the Preamplifier Output match what is set for that zone in Accelerator Step 9e and TC Flex 2 Step 7e. (see image below)
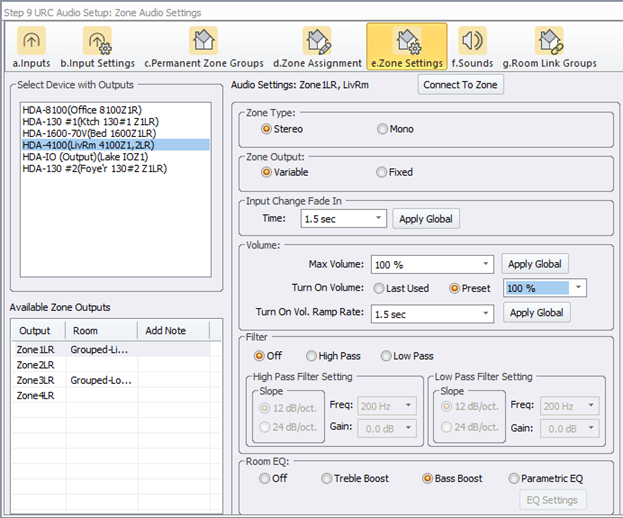
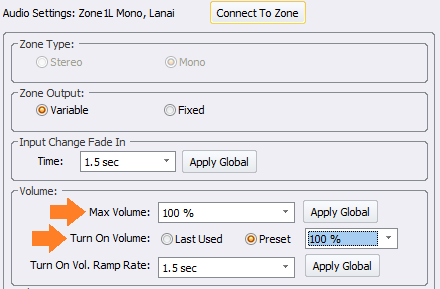
If a “Full Range” Line Level audio output from the Preamplifier Output is desired, set the “Max Volume” parameter to “100%” and the “Turn On Volume” to “Preset – 100%”.
Do not connect speakers to the zone’s speaker output for the zone that is assigned to this preamplifier output. The zone’s volume output is fixed at 100% - this will most likely damage any speaker connected to this zone. (see pic below)
Additional Information & Resources:
To learn more about HDA products and programming, please see the HDA Programmers Guide or the Accelerator 3 online Programming Guide.
