How to Export Driver Files
URC Accelerator 3 software provides an option for exporting driver files from an existing project file. Driver files are embedded in the project file when devices are added to the project tree. Exporting these driver files can be useful, for example, when a new programmer does not have access to the original program file and needs to edit an existing driver. This eliminates the need to have to create an already existing driver from scratch.
This article details the steps required when using the Export Driver Files feature built into the Accelerator 3 software.
Note: Connected Device commands for Two-Way devices will also be exported, if the commands exist in the two-way module.
Note: Do not copy & paste two-way driver files into the drivers folder. This will "break" the two-way driver/module.
Please download the module from the URC portal and re-import the TCM module using the import function.
To export your Total Control Accelerator driver files, follow the steps listed below:
Step #1:
Create a folder on your computer, a place easy to locate such as the Desktop, and label it accordingly. "TC_exported_drivers" or something descriptive works best.
Note: If you don't create a folder and then export them to your desktop, they will be placed all over your desktop. This can make it difficult to locate all of them! Create a folder.
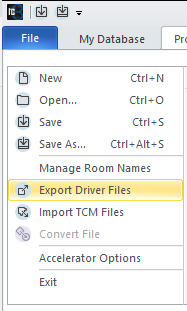
Step #2:
Go to the Accelerator program File menu and select Export Driver Files:
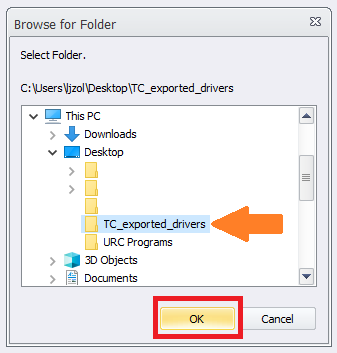
Step #3:
Browse to the folder that you just created, select it and click OK. This exports all of the drivers to that folder. They are exported as .csd, .cd2 or .cd3 files depending on the version of Accelerator you are using:
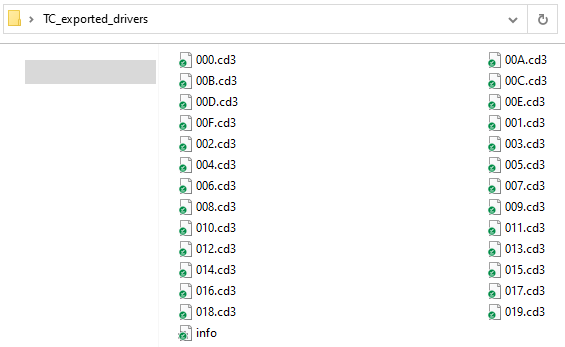
Step #4:
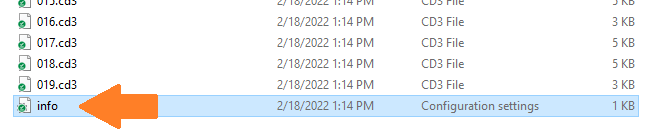
After opening the folder containing the exported drivers, you will see files listed with seemingly random names (numbers/letters). To determine which file is a specific driver, follow Step #5 shown next.
Step #5:
Locate the "info" file. Double-click on this file to open it or open it manually using the Windows Notepad application (Notepad is usually the default application for this type of file).
Step #6:
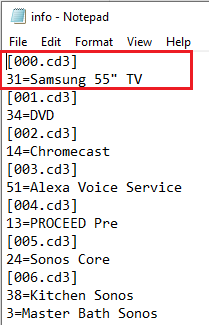
Opening the file in Notepad displays a listing of all the exported drivers along with other pertinent information to help you determine the specific device the driver actually controls. The amount of drivers exported depends upon how many were originally added to the project.
In the example below, the driver listed as"000.cd3" also lists "31=Samsung 55" TV" directly below it. This tells me that driver "000.cd3" is the driver for the Samsung 55" TV. The name listed will be the same as it was/is listed in the project tree.
Note: Connected Device commands for two-way devices will also be exported, if the commands exist in the two-way module.
Step #7:
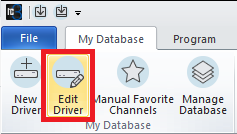
To open the driver to verify it is the device you need or to edit the driver, do the following:
Use the My Database tab in the Accelerator program, select Edit Driver, then browse to the folder containing the driver you want to open.
Step #8:
After opening and editing the driver, you must then save it to the CustomDrv folder on your computer to be able to be used again in the Accelerator program.
The CustomDrv folder is the default location where custom drivers are stored in Accelerator (on your computer). You can do this a few ways.
Method 1:
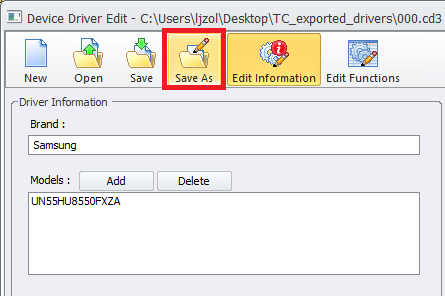
The most common method is to do it after reviewing or editing the driver from within the editing window by using the Save As option as shown below. Usually, you will name the driver as descriptively as possible to be easily identified and located in the future.
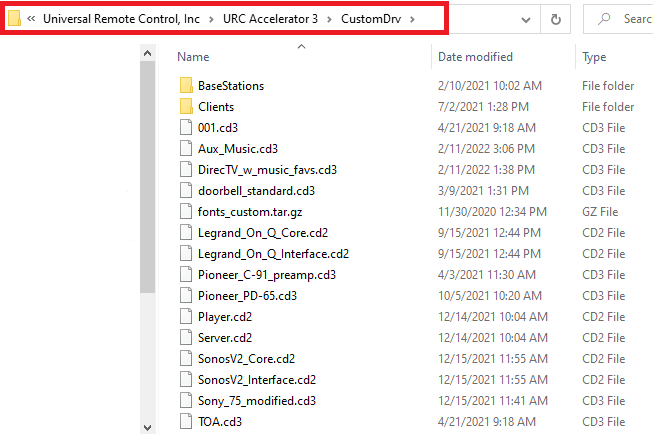
By default, the save location will be the folder that you opened the original "000.cd3" file from-the exported driver folder. To save it to the CustomDrv folder, browse to and use this default file path:
C:\Users\<user>\Documents\Universal Remote Control, Inc\URC Accelerator 3\CustomDrv
Note: <user> will be the actual user name of the computer user.
Method 2:
The other method is to save multiple files into the exported driver folder that you created and then, after reviewing or editing each driver independently, copying them in bulk to the CustomDrv folder. Once the drivers are copied into this default folder, they will be available to the programmer via the My Database radio button in Accelerator Step #4.
After copying your driver files to the CustomDrv folder, you can safely delete the folder that was created on your desktop, if desired.
Pro Tip: Many programmers will save their custom drivers to a cloud service such as Dropbox, Google Drive, OneDrive, etc. for safekeeping.
Note: Do not copy & paste two-way driver files into the drivers folder. This will "break" the two-way driver/module.
Please download the module from the URC portal and re-import the TCM module using the import function.
Additional Information & Resources:
To learn more about Accelerator driver creation, please see the article Basics of Driver Creation.
To learn more about editing an Accelerator driver already in a project, please see the article How to Edit a Driver Within the Project Tree.
To learn more about Accelerator 3 configuration and programming, please see the Accelerator 3 online Programming Guide.
