Total Control Accelerator 3 offers a large variety of built-in icons for buttons that enable installers to add a higher degree of personalization & customization to projects and the various URC Graphical User Interfaces (GUI's). In addition, URC offers the Total Control Graphics Expansion Pack and the Flat Vector Icon Sets that offer increased customization options. Included in the Total Control Flat Vector Icon Sets download are the Flat Vector Icon Sets, instructions and Source Files for even further advanced graphics manipulation options. Each set contains over 1200 icons!
When properly installed, programmers have the flexibility to change the look of main and sub-menus within a Total Control project.
This article details How To Modify Existing Accelerator Icon Sets in Accelerator 3. The process is also very similar in Accelerator 2.0 using a slightly different file path, where applicable.
Article Contents
Changing the Colors of Flat Vector Icons
Using Photopea in Google Chrome
Colorize an Icon on a White Background
Make an Icon White and Colorize its Background
Colorize an Icon on a Black Background
Coordinating Icon Colors
Flat Vector Icons
The Flat Vector icon sets are a family of similarly-styled icons for Total Control Accelerator 3. Each set of Flat Vector icons is available as a separate download.
Icon Styles
URC provides several styles of Flat Vector icons that are ready for use in Accelerator 3, plus a set of source files that make it easy for graphic designers to create their own icon styles. You can also use a graphics application to edit the colors of icons Flat Vector Icons Set 1 to produce many color variations.
Changing the Colors of Flat Vector Icons:
You can easily change the colors of the icons in Flat Vector Icons Set 1 to display any colors that your client wants.

This section is a guide for graphics novices who want to make simple color changes to icons without purchasing or learning complex programs like Photoshop or GIMP.
Note: This procedures here only provide instructions for basic color changes. If you are familiar with graphics software, you can use the graphics editor you are most comfortable with to make any changes you need. Advanced graphics users can also work with the included Core Set, which contains black icons on a transparent background.
Using Photopea in Google Chrome:
The color-editing procedures in this guide use Photopea, a web-based image editor, to adjust the colors of the Flat Vector icons. After editing each icon, you will need to save the newly colorized file to your computer.
Since Photopea is an online editor, saving a file is the same as downloading a file from a website. By default, Google Chrome saves each downloaded file with its existing filename to a folder named Downloads. This does not allow you to easily name the file with the correct Hex color extension.
To give each file the correct name, you will need to set your Chrome browser settings to allow you to choose a filename and location for each downloaded file.
To change download settings in Google Chrome:
1. Choose Customize and Control Google Chrome.
2. Choose Settings. The Settings page displays.
3. At the bottom of the page, click Advanced. Additional options appear.
4. Click Ask where to save each file before downloading to turn it on.
Colorize an Icon on a White Background:
These steps walk you through using Photopea to edit a Set 1 icon to create a color-on-white icon, similar to the icons in Set 5.

Although the steps list specific values for some of the settings, feel free to use any values you prefer. If you are creating a set of icons, they will look best together if you coordinate the colors of all the icons in the set you are editing.
To Edit an Icon’s Color:
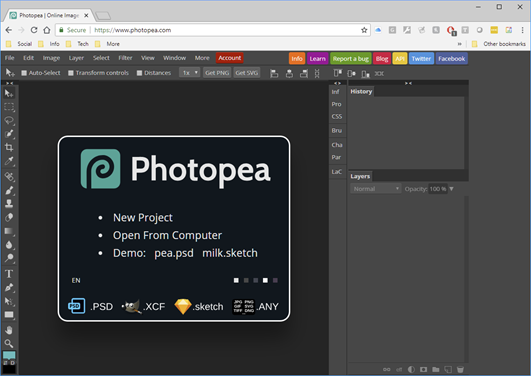
1. In your web browser, go to www.Photopea.com to open Photopea:

2. Choose File > Open. The Open window displays:
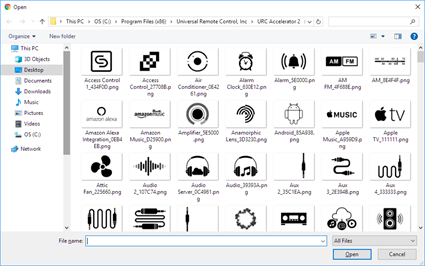
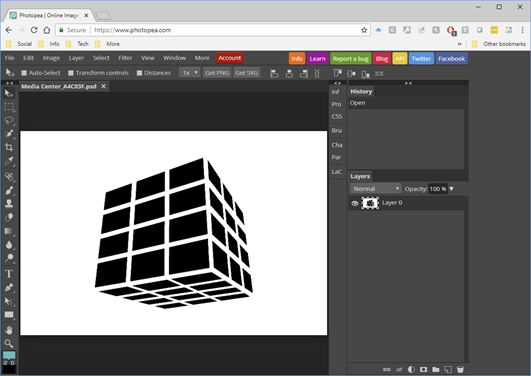
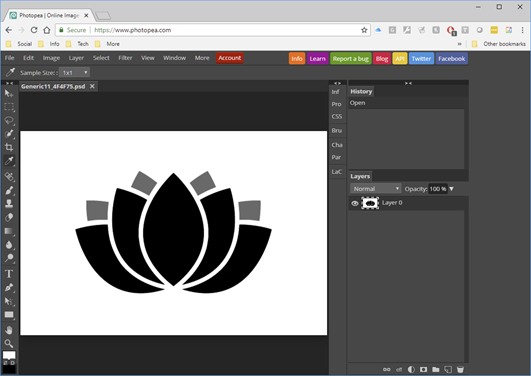
3. In the Open window, browse to the folder where you saved the Set 1 icons, then double-click the icon file you want to edit. The icon file displays in Photopea:
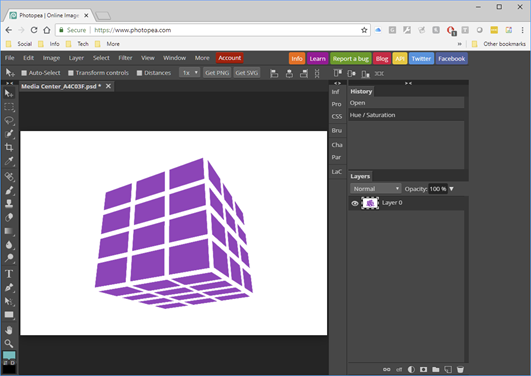
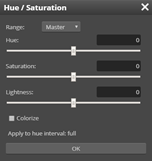
4. Choose Image > Adjustments > Hue / Saturation. The Hue/Saturation window displays:

5. Select the Colorize option.
6. Set Saturation to 50.
7. Set Lightness to 50
8. Set Hue to your desired color for this icon.
9. Click OK. The icon displays in your desired color:
10. Select the Eyedropper tool, then click on a color area of the icon. A sample of the color appears in the Foreground Color box:
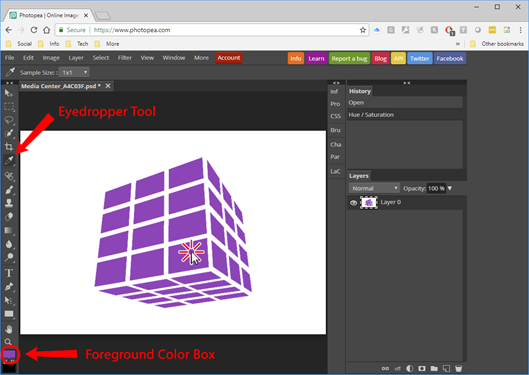
11. Click the Foreground Color box. The Color Picker window displays:
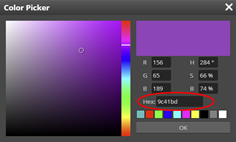
12. Remember the value in the Hex field.
Note: This Hexadecimal value sets the color behind the icon label on the Total Control main menu, as well as setting the color of several other user interface elements. You will add this value to the file name of the icon in a later step.
13. Click OK to close the Color Picker window.
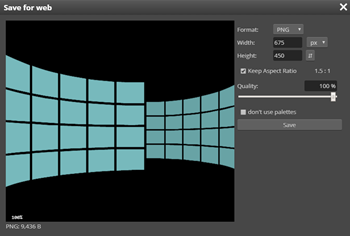
14. Choose File > Export As > PNG. The Save for Web window displays:
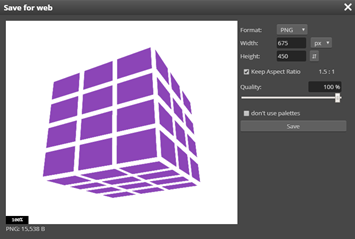
15. In the Save for Web window, click Save. (If you are using the Microsoft Edge browser, also click the up arrow next to Save, then click Save As.)
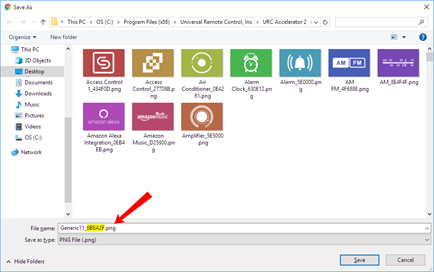
16. The Save As window displays. Browse to the folder where you want to save your edited file:
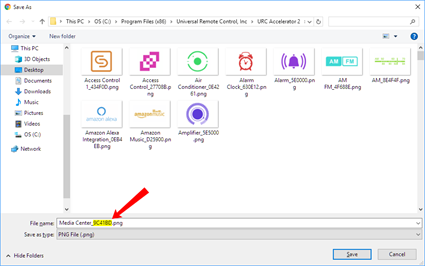
17. In the File Name box, edit the file name to replace the existing Hex value with the hex value you remembered earlier.
18. Click Save. Your icon is now ready.
Make an Icon White and Colorize its Background:
These steps walk you through using Photopea to edit a Set 1 icon to create a white-on-color icon. Flat Vector Icon Set 3 contains a full set of icons in this style but the following steps let you choose your own colors if you prefer a different color palette.

Although the steps list specific values for some of the settings, feel free to use any values you prefer. If you are creating a set of icons, they will look best together if you coordinate the colors of all the icons in the set you are editing.
To Edit an Icon’s Color:
1. In your web browser, go to www.Photopea.com to open Photopea:
2. Choose File > Open. The Open window displays.

3. In the Open window, browse to the folder where you saved the Set 1 icons, then double-click the icon file you want to edit. The icon file displays in Photopea.
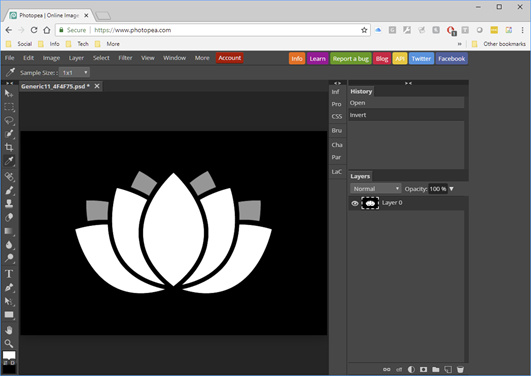
4. Choose Image > Adjustments > Invert. The icon image switches to white-on-black.
5. Choose Image > Adjustments > Hue / Saturation. The Hue/Saturation window displays.
6. Select the Colorize option.
7. Set Saturation to 50.
8. Set Lightness to 50
9. Set Hue to your desired color for this icon.
10. Click OK. The icon displays in your desired color.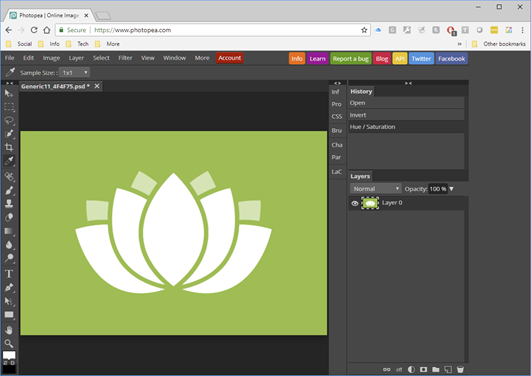
11. Select the Eyedropper tool, then click on a color area of the icon. A sample of the color appears in the Foreground Color box.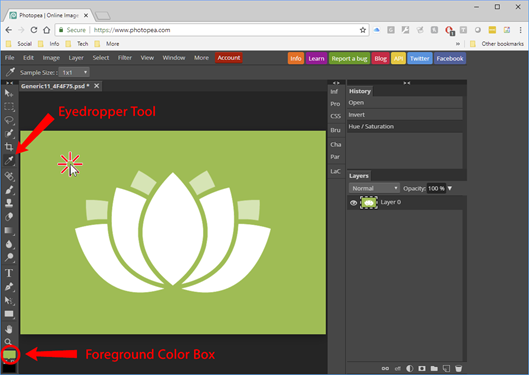
12. Click the Foreground Color box. The Color Picker window displays.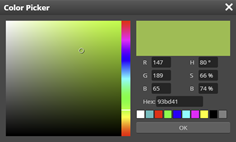
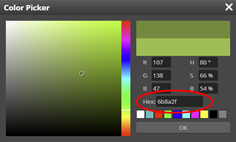
13. Reduce the B (Brightness) setting to approximately 20 less than its current setting. (This step establishes a good label area color for Total Control Main Menu icons.)
14. Click the value in the Hex field to update it. Remember the new value in the Hex field.
Note: This Hexadecimal value sets the color behind the icon label on the Total Control main menu, as well as setting the color of several other user interface elements. You will add this value to the file name of the icon in a later step.
15. Click OK to close the Color Picker window.
16. Choose File > Export As > PNG. The Save for Web window displays.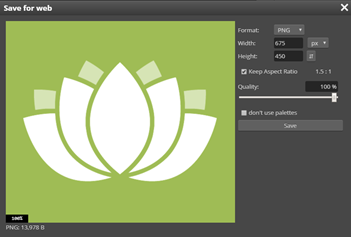
17. In the Save for Web window, click Save. (If you are using the Microsoft Edge browser, also click the up arrow next to Save, then click Save As.)
18. The Save As window displays. Browse to the folder where you want to save your edited file.
19. In the File Name box, edit the file name to replace the existing Hex value with the Hex value you remembered earlier.
20. Click Save. Your icon is now ready.
Colorize an Icon on a Black Background:
These steps walk you through using Photopea to edit a Set 1 icon to create a color-on-black icon.
Although the steps list specific values for some of the settings, feel free to use any values you prefer. If you are creating a set of icons, they will look best together if you coordinate the colors of all the icons in the set you are editing.
To Edit an Icon’s Color:
1. In your web browser, go to www.Photopea.com to open Photopea:
2. Choose File > Open. The Open window displays.
3. In the Open window, browse to the folder where you saved the Set 1 icons, then double-click the icon file you want to edit. The icon file displays in Photopea.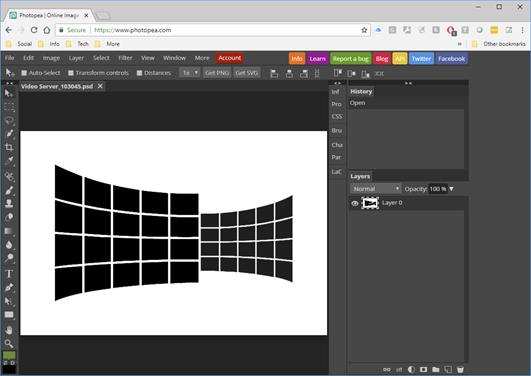
4. Choose Image > Adjustments > Invert. The icon image switches to white-on-black.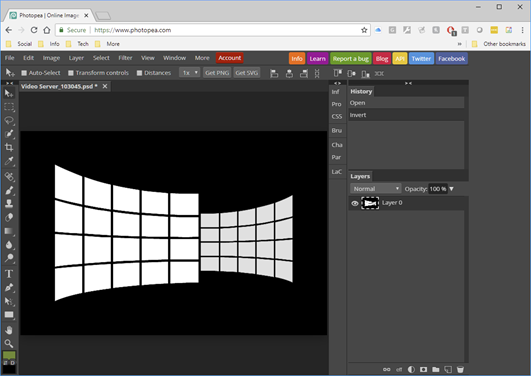
5. Choose Image > Adjustments > Hue / Saturation. The Hue/Saturation window displays.
5. Select the Colorize option.
6. Set Saturation to 50.
7. Set Lightness to -50 (negative 50).
8. Set Hue to your desired color for this icon.
9. Click OK. The icon displays in your desired color:
10. Select the Eyedropper tool, then click on a color area of the icon. A sample of the color appears in the Foreground Color box: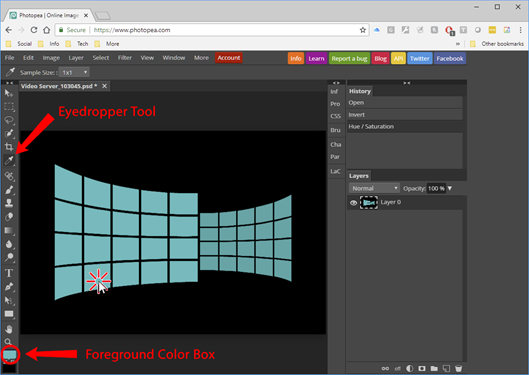
12. Click the Foreground Color box. The Color Picker window displays.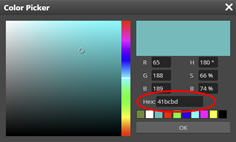
13. Remember the value in the Hex field.
Note: This Hexadecimal value sets the color behind the icon label on the Total Control main menu, as well as setting the color of several other user interface elements. You will add this value to the file name of the icon in a later step.
14. Click OK to close the Color Picker window.
15. Choose File > Export As > PNG. The Save for Web window displays.
16. In the Save for Web window, click Save. (If you are using the Microsoft Edge browser, also click the up arrow next to Save, then click Save As.)
17. In the Save for Web window, click Save. (If you are using the Microsoft Edge browser, also click the up arrow next to Save, then click Save As.)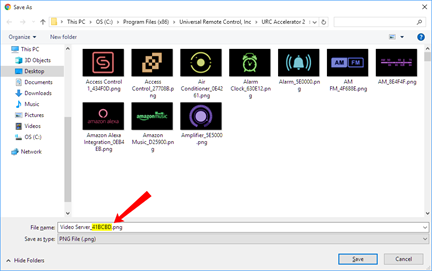
18. In the File Name box, edit the file name to replace the existing Hex value with the hex value you remembered earlier.
19. Click Save. Your icon is now ready.
Coordinating Icon Colors:
In most cases, if colors are randomly picked, they will not look very good together on a touch screen. When graphic artists design a group of icons for a project, they make sure that the various colors all work together visually. The procedures in this document tell you how to change icon colors individually, but if you want to add that extra bit of polish to your touch screen layouts, consider using these sets of coordinating colors together.
The values here include both the Hue / Saturation / Lightness values for Photopea and the Hex values that are commonly used for websites and graphics applications:

Photopea is a trademark of Ivan Kutskir. Photoshop is a trademark of Adobe Inc.
Additional Information & Resources:
Please also refer to the article Adding & Using the Flat Vector Icon Sets.
Download the Total Control Graphics Expansion Pack from the URC Dealer Portal (You must first be logged-in to download the file).
Download the Total Control Flat Vector Icon Sets from the URC Dealer Portal (You must first be logged-in to download the file).
To learn more about Accelerator 3 configuration and programming, please see the Accelerator 3 online Programming Guide.
