URC HDA devices and Accelerator software provide countless options to configure and optimize audio settings to achieve performance and flexibility for almost any application.
One of those features is the HDA Amplifier 12V (Volt) Outputs. These configurable 12V Outputs allow for the activation or turn-on of ancillary devices such as external power amplifiers, video projectors, motorized screens, etc.
This article provides information on configuring, programming, and using the 12V Outputs on the HDA-4100, HDA-8100 and HDA-1600 amplifiers as well as the HDA-IO Stream Adapter and details the procedure for configuring the 12V Output settings when using Accelerator 3 or TC Flex 2 software.
12 V Outputs:
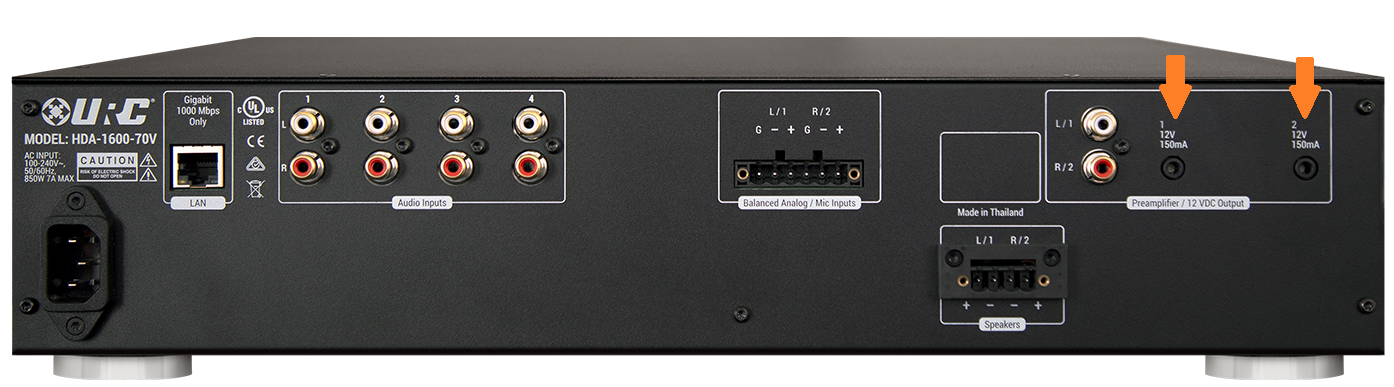
The HDA-1600-70V contains two (2) configurable 12V, 150mA outputs.
The HDA-8100 contains two (2) configurable 12V, 150mA outputs.
The HDA-4100 contains two (2) configurable 12V, 150mA outputs.
The HDA-IO contains one (1) configurable 12V, 150mA output*
The HDA-130 does not have configurable 12V outputs.
* The HDA-IO 12V output is only available when the HDA-IO is being used as an output device. This is because of how Accelerator is setup, not a limitation of the HDA-IO.
HDA-1600 rear panel showing the 12V output locations:
HDA-4100 rear panel showing the 12V output locations:

HDA-8100 rear panel showing the 12V output locations: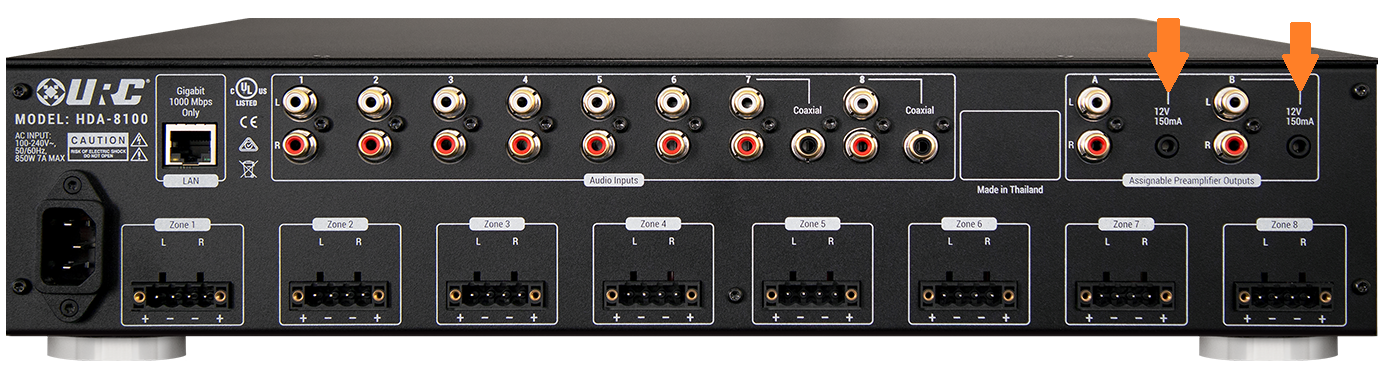
HDA-IO rear panel showing the 12V CTRL (output) location: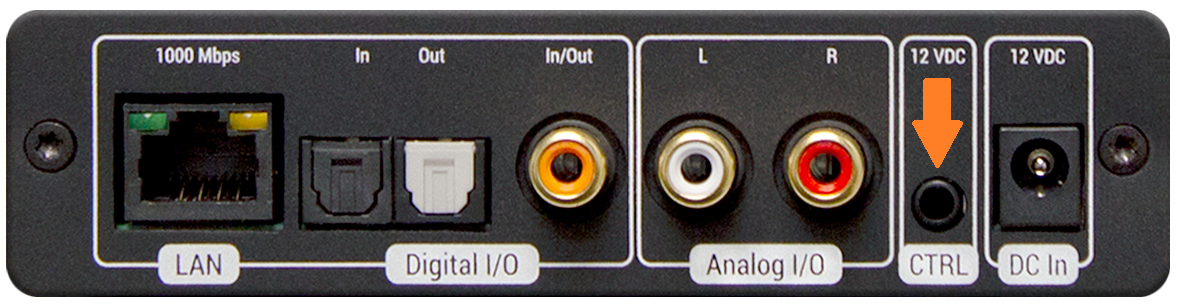
Configuring for Desired Operation:
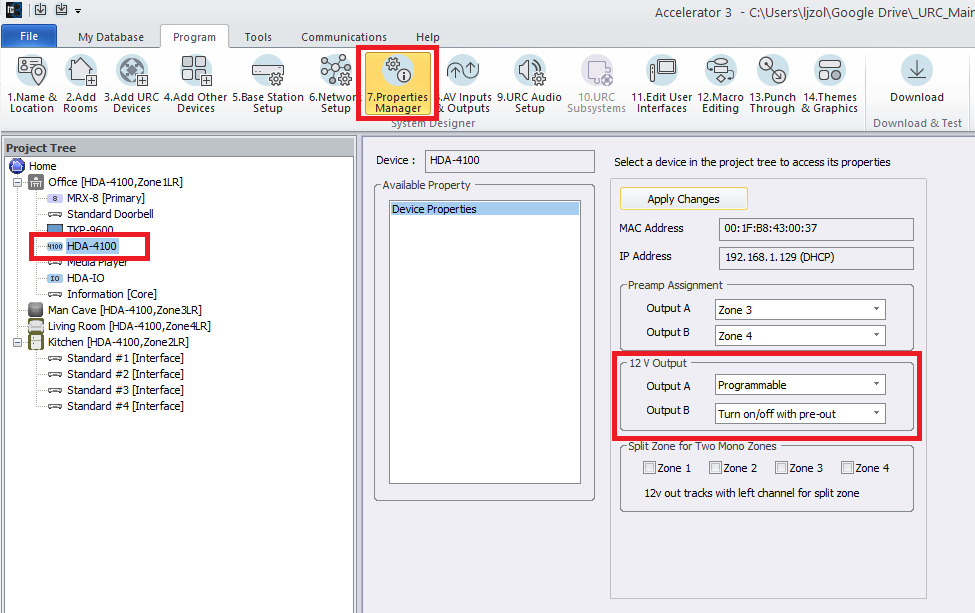
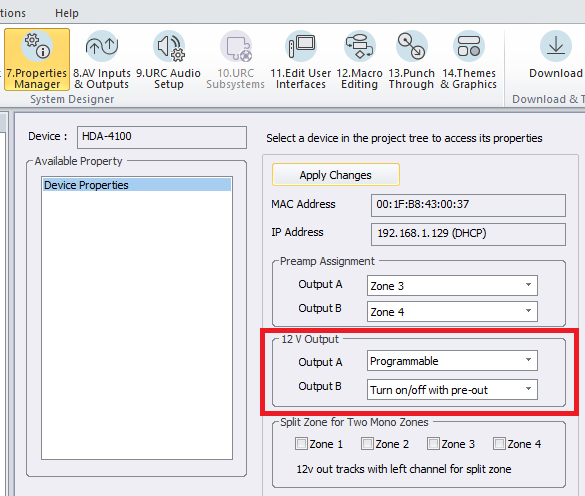
Use Step #7, Properties Manager while the HDA amplifier is selected in the Project Tree. Use the available drop-down menu to select and configure the 12V output(s) for either Turn on/off with pre-out (default) or Programmable. The software will ask you to save your changes before proceeding to the next step.
You can also right-click on the desired HDA amp in the Project Tree and select Properties (only available through Step #6).
When using Flex 2, right-click on the desired HDA amp in the Project Tree and then select Properties.
Note: You may also select the desired 12V output operation when first adding the device to your project.
Image below shows the location in Accelerator to configure the properties for the 12V Outputs (Step #7):
The available options are:
• Turn on/off with pre-out (default)
• Programmable
Option #1 - Turn on/off with pre-out (default):
This option will allow activation of the desired 12V Output by following the power state of the zone - i.e., When the zone the pre-out is assigned to is ON, the 12V trigger is high (activated). When the zone the pre-out is assigned to is OFF, the 12V trigger is low (deactivated).
Option #2 - Programmable:
This option will allow you to activate the desired 12V Output whenever the specific 12V output is activated by a command or macro command.
This is programmed in Steps #12b, 12c or 12d by selecting the "lightning bolt" icon while in the macro window (see image below)
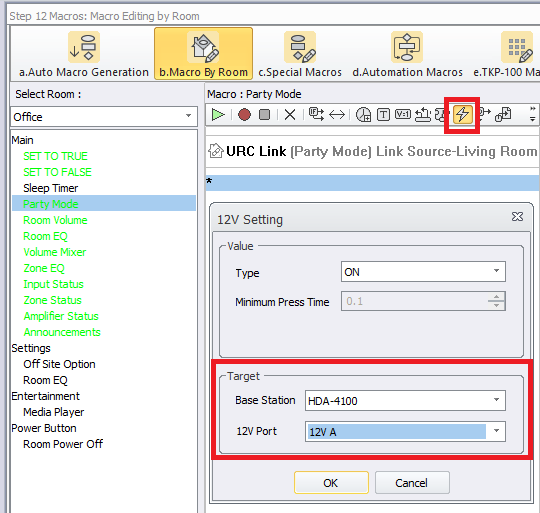
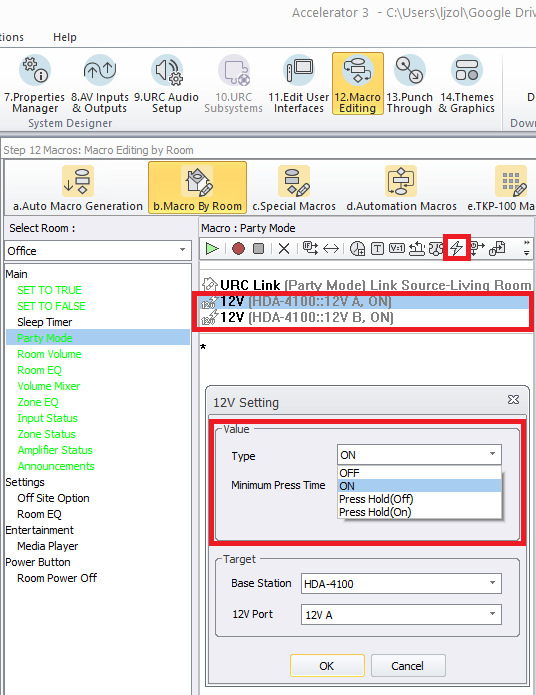
In the image shown below, we show how to turn ON both 12V Output A & B whenever Party Mode is selected. Each 12V Output command must be added separately and we can select ON, OFF, Press Hold (Off) and Press Hold (On) from the drop-down menu. If using the later two options, we can adjust the On/Off momentary trigger time under the Minimum Press Time parameter option. This is useful when an ancillary device only requires a momentary 12V command to turn it On or Off.
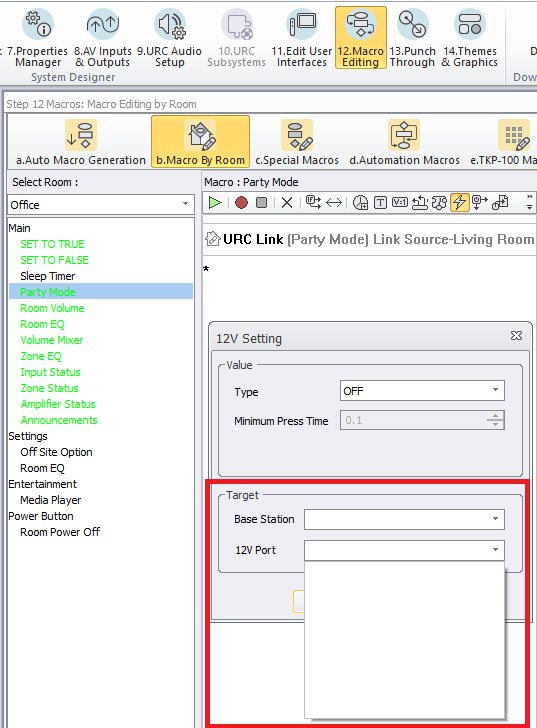
Note: If both 12V Output A & B are set to "Option #1 - Turn on/off with pre-out", then the 12V option will not be visible in programming Steps #12b, 12c or 12d (or elsewhere). The Target> Base Station and 12 Port selections will be blank. To change or correct this, simply change the desired Output A or B (or both) to Programmable as detailed above.
HDA 12 V Outputs When Using Expressway Programming Mode:
Expressway will allow for the same options as the full Experience Programming Mode. The HDA 12V Outputs can be used to track the zone power and be used to trigger external devices. Make sure that the correct configuration is enabled in the Properties programming step for an HDA device.
The available options are:
• Turn on/off with pre-out (default)
• Programmable
Additional Information & Resources:
To learn more about HDA products and programming, please see the HDA Programmers Guide or the Accelerator 3 online Programming Guide.
