URC HDA devices and Accelerator software provide countless options to configure and optimize audio settings to achieve performance and flexibility for almost any application.
One of those features is the audio sensing automation capabilities for HDA devices (amps & input devices). This feature allows for the activation of any macro or turn-on of a zone when signal is sensed at the audio input.
This article provides information on configuring, programming, and using the audio sensing automation capabilities on the HDA-4100, HDA-8100, HDA-130 and HDA-1600 amplifiers as well as the HDA-IO Stream Adapter and details the procedure for configuring the audio sensing settings when using Accelerator 3 software.
Audio Sensing Inputs:
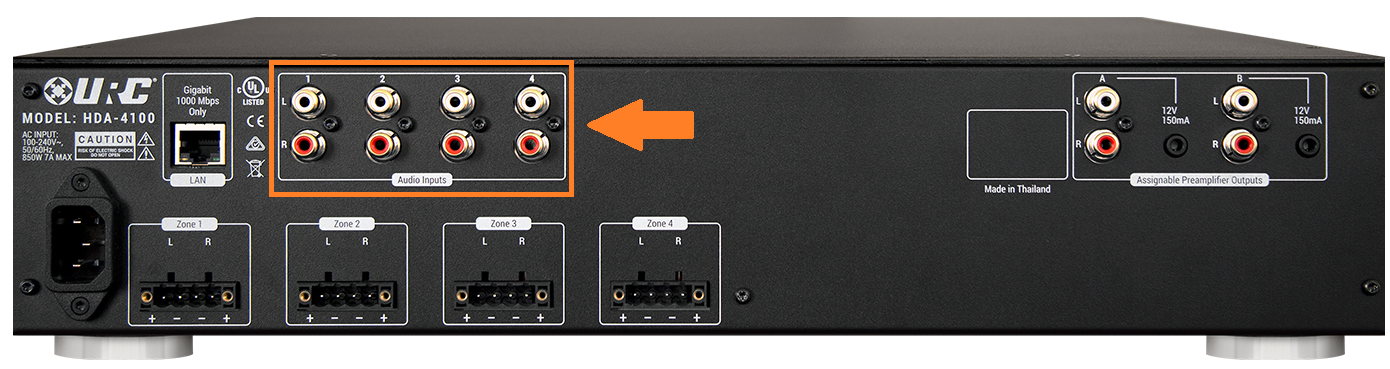
- The HDA-4100 contains four (4) audio sensing inputs (pictured above).
- The HDA-8100 contains eight (8) audio sensing inputs. Only one of the digital inputs can be used for audio sensing, whatever one is assigned in Accelerator during the initial setup.
- The HDA-1600-70V contains six (6) audio sensing inputs when used with two microphones. It has five sensing inputs when used with the balanced stereo line in.
- The HDA-IO contains one (1) audio sensing input*.
- The HDA-130 contains two (2) audio sensing inputs.
* The HDA-IO audio sensing input is only available when the HDA-IO is being used as an input device. When using the HDA-IO as a stream injector, the input selected for use as the streaming input is the only input providing audio sensing.
Configuring for Audio Sensing Automation:
Step 1: The initial settings are done under Accelerator Step #5-Base Station Setup and Step #5b-Sensors. The example below shows using the HDA-4100, Port #1 (analog/unbalanced audio input 1) as the desired sensing input.
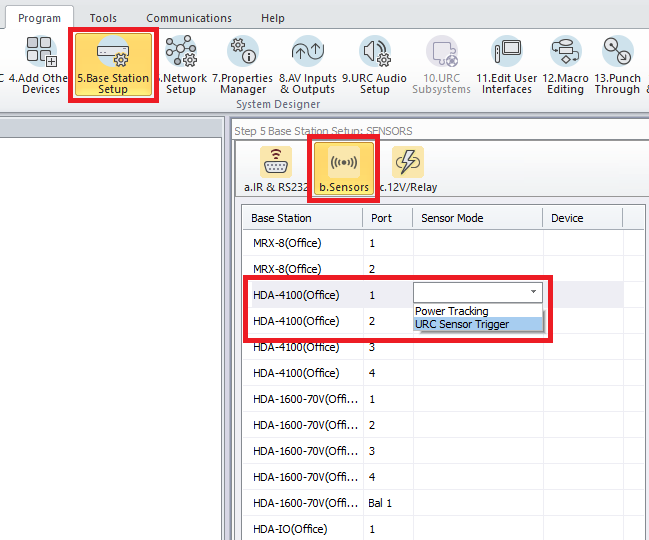
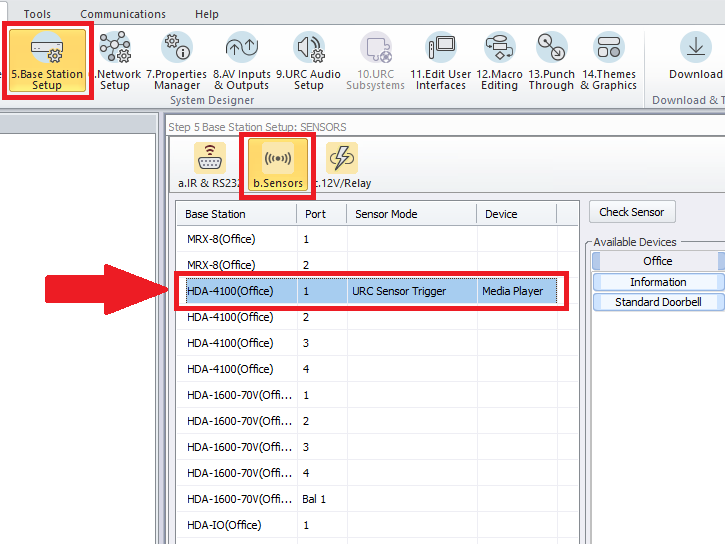
Step 2: From the list of available devices, drag over the audio device to the correct port on the HDA unit and verify that URC Sensor Trigger is selected, not Power Tracking. The example below shows the Media Player connected to Port #1 on an HDA-4100 amplifier.
The available options for URC sensors are:
• Power Tracking (not used for this scenario)
• URC Sensor Trigger - This is the setting required when using the audio sensing feature
Step 3: Go to Accelerator Step #12c, Special Macros. On the left-side pull-down menu select URC Sensor Trigger Macros.
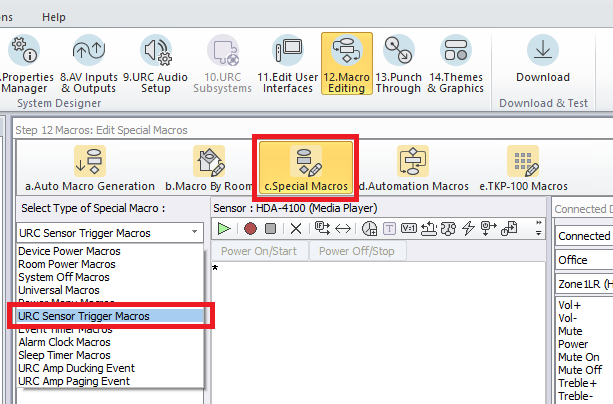
Step 4: The unprogrammed trigger macro event will be listed in red (as shown below):

Step 5: In the main macro window, select the IF Statement Type button and then select the "Else" option.
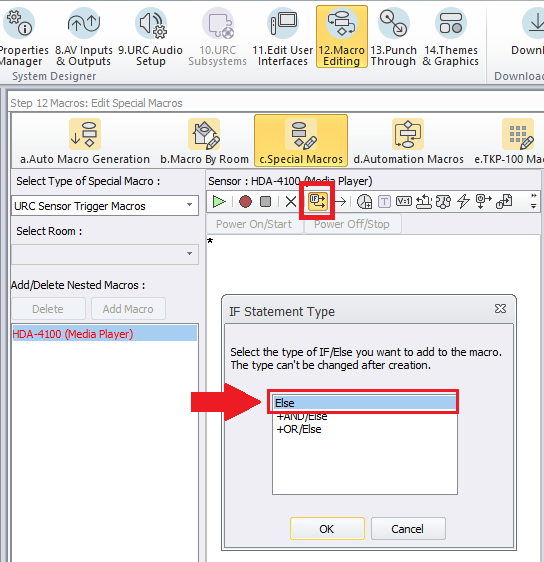
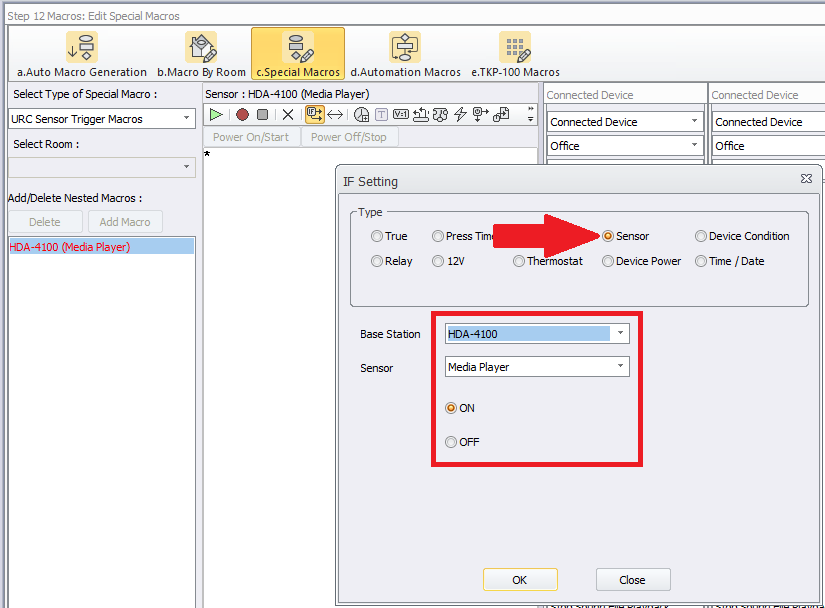
Step 6: After selecting "Else", the IF Setting window will pop up asking you to select the Type of action/trigger desired. Select the Sensor option radio button as shown below then select the specific input being used for audio sensing. In the example below, I choose the Base Station as the HDA-4100 and the Sensor as the Media Player device assigned in Step 2. You will then select the ON or OFF option.
ON = when signal is sensed
OFF = when signal is not sensed
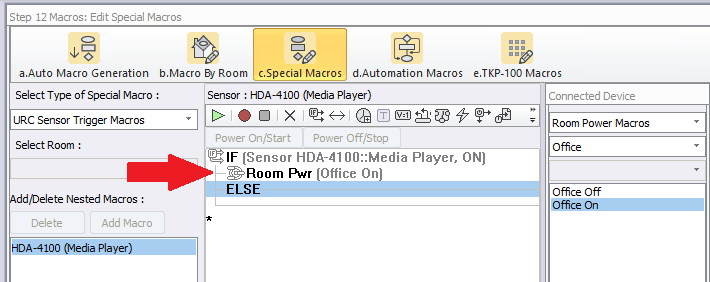
Step 7: You can then program a macro as needed for when the input senses audio. The example below shows a Room Pwr macro inserted below the IF query. Any macro can be used in this location and considerations should be made for source tracking, etc.
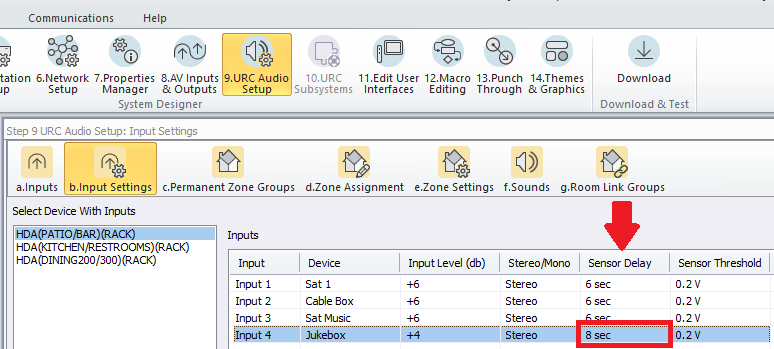
Step 8: If using a Ducking Event with a device such as a jukebox, you may have to adjust the Sensor Delay setting to prevent the Ducking Event from reverting back to the main audio source prematurely. The image below shows a setting of 8 sec to prevent the jukebox from reverting back during quiet passages or during song transitions. You may need to adjust this setting depending upon the specific audio source being sensed by the HDA equipment.
Additional Information & Resources:
Please refer to this article giving a basic overview of the HDA Ducking Event and its capabilities
You can also view the short video in the URC Video Portal titled Audio Source Automation: Create automation using HDA audio sensors utilizing a 3rd party audio source as the trigger.
To learn more about HDA products and programming, please see the HDA Programmers Guide or the Accelerator 3 online Programming Guide.
